When to Replace a Worn Chain
Methods for spotting a worn chain are compared, using gauges and chain checkers to measure wear. Replacing in good time protects your cassette and chainrings.
In this article
Knowing when to replace your chain is an important aspect of bicycle maintenance that can help extend the life of components and maintain optimal drivetrain performance. This article covers the various tools and methods for determining when to replace a bicycle chain.
Getting Started
Chains are a consumable part of the bicycle drivetrain. As you pile on the miles, your bike’s chain will wear out. The internal parts of the chain (the rivets and rollers) begin to wear out, giving the illusion of stretching. This wear can cause the chain to mesh poorly with cogs and chainrings, causing poor shifting and premature wear to the cogs. Since it’s far more expensive to replace your cassette than it is to replace a chain, knowing when to replace your chain can actually save you some money in the long run.
Before looking closely at the chain itself, there are a few symptoms that can occur while riding that may indicate a worn chain. Two common problems are a chain that consistently slips under load, and chain suck (where the chain remains engaged on one chainring when shifting to another chainring under load, causing it to bind and hang on longer than it should). Make sure your shifting is dialed in, and your chain is clean and lubed.
There are different methods for measuring chain wear from simply lifting the chain off of the front chainrings to measuring the distance between two rivets on your chain. But the easiest and most accurate way to determine chain wear is by using a chain wear indicator tool.
You may either place your bike in a repair stand or leave it on the ground as long as it remains stable and will not shift or tip over.
Method 1: Lift off Chainring
The first method for checking chain wear is to simply lift the chain off the front chainring. Shift into the smallest cog on the rear and largest chainring in front and lift the chain off of the chainring.
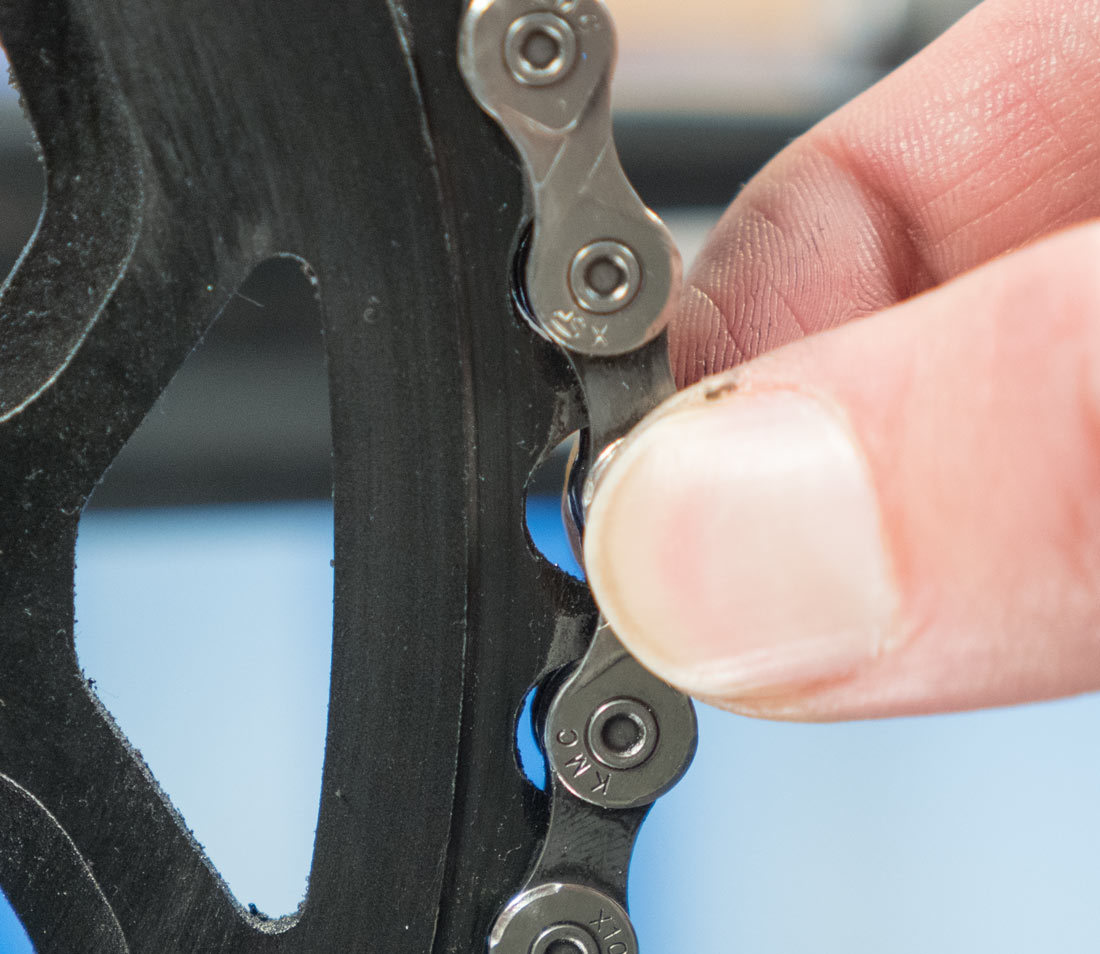
If it lifts off the chainring to the point where you can see a lot of daylight between your chain and chainrings, you’ll either need to replace your chain, or you are fast approaching the point of replacement. It’s not as accurate as using the proper tool, but it’s a good starting point if you haven’t replaced your chain in a while.
Method 2: Measure with Ruler
Another ballpark method for checking chain wear is by measuring it with a ruler. Pick a rivet and line it up at the zero mark. Count 24 more rivets and your last rivet should be at the 12″ mark of your ruler. If it is off by more than 1/16″ your chain is stretched to the point of replacement.
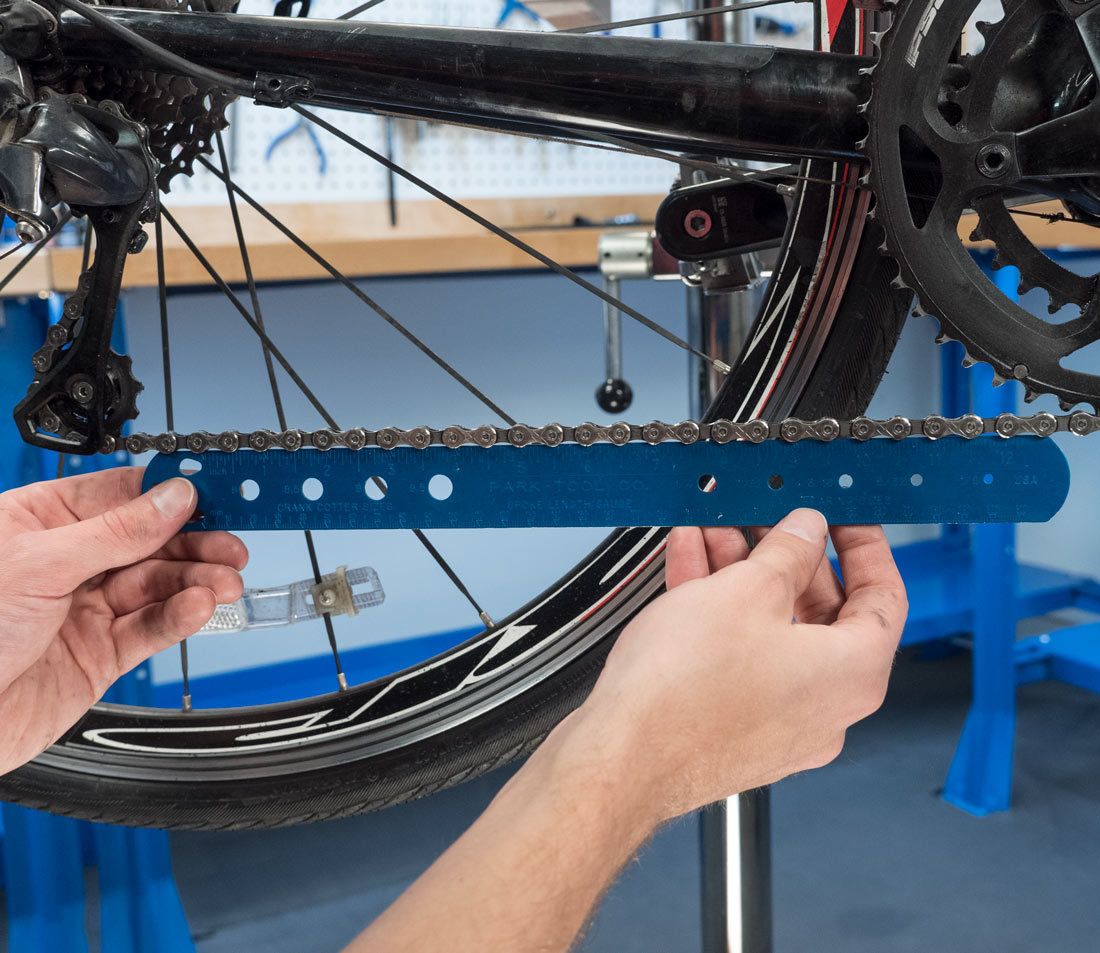
Line up first rivet at zero mark
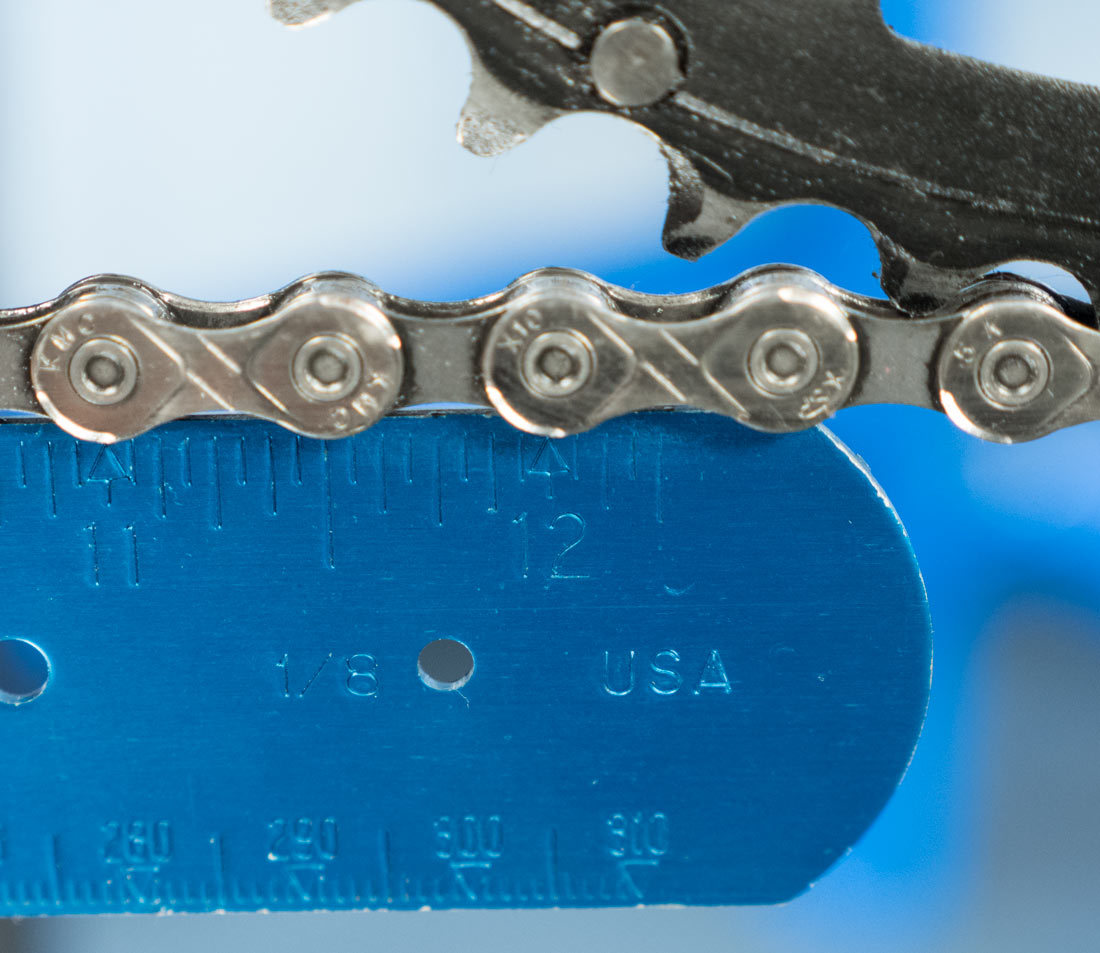
Check last rivet at 12" mark
Method 3: Use CC-4
The CC-4.2 Chain Checker contacts the chain in three places, providing an accurate measurement on all 5-to-12 speed bicycle chains, including SRAM® AXS® 12-speed chains and other chains with irregular roller sizes. The CC-4.2 accurately indicates when a chain has reached 0.5%, 0.75%, and 1.0% wear, the points at which most manufacturers suggest replacement.
Lower the CC-4.2 onto the chain while keeping the gauge tip above the chain.
Apply and maintain tension on the short section of chain as shown. This is a crucial step in order to obtain an accurate reading.
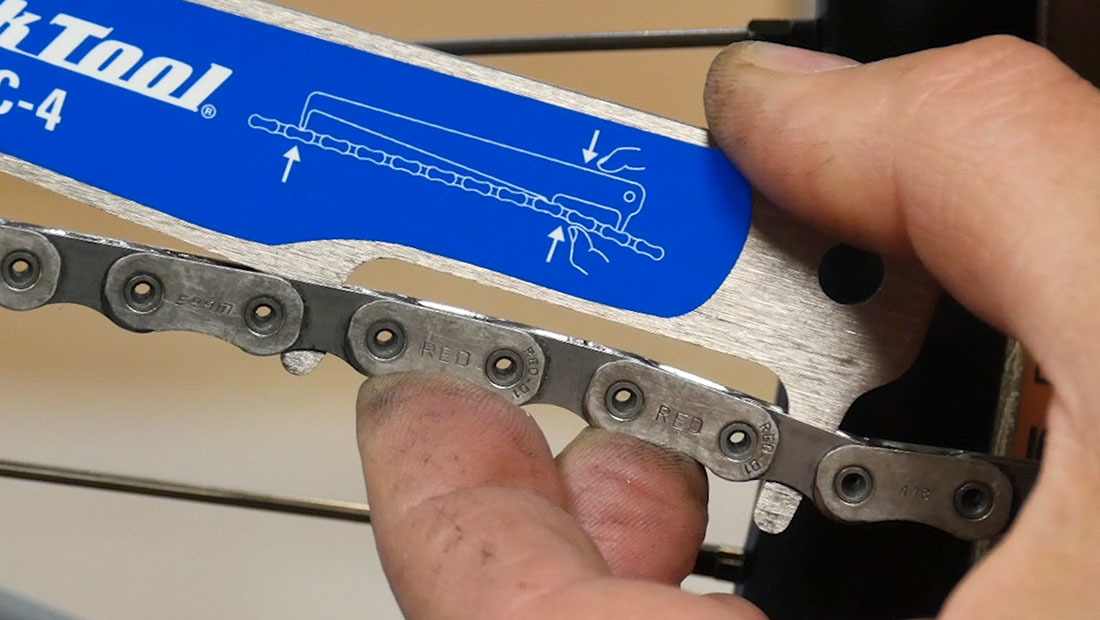
While maintaining tension on the chain, push the chain onto the gauge tip to determine if the chain is worn. The position of the gauge tip will indicate the wear level of the chain.
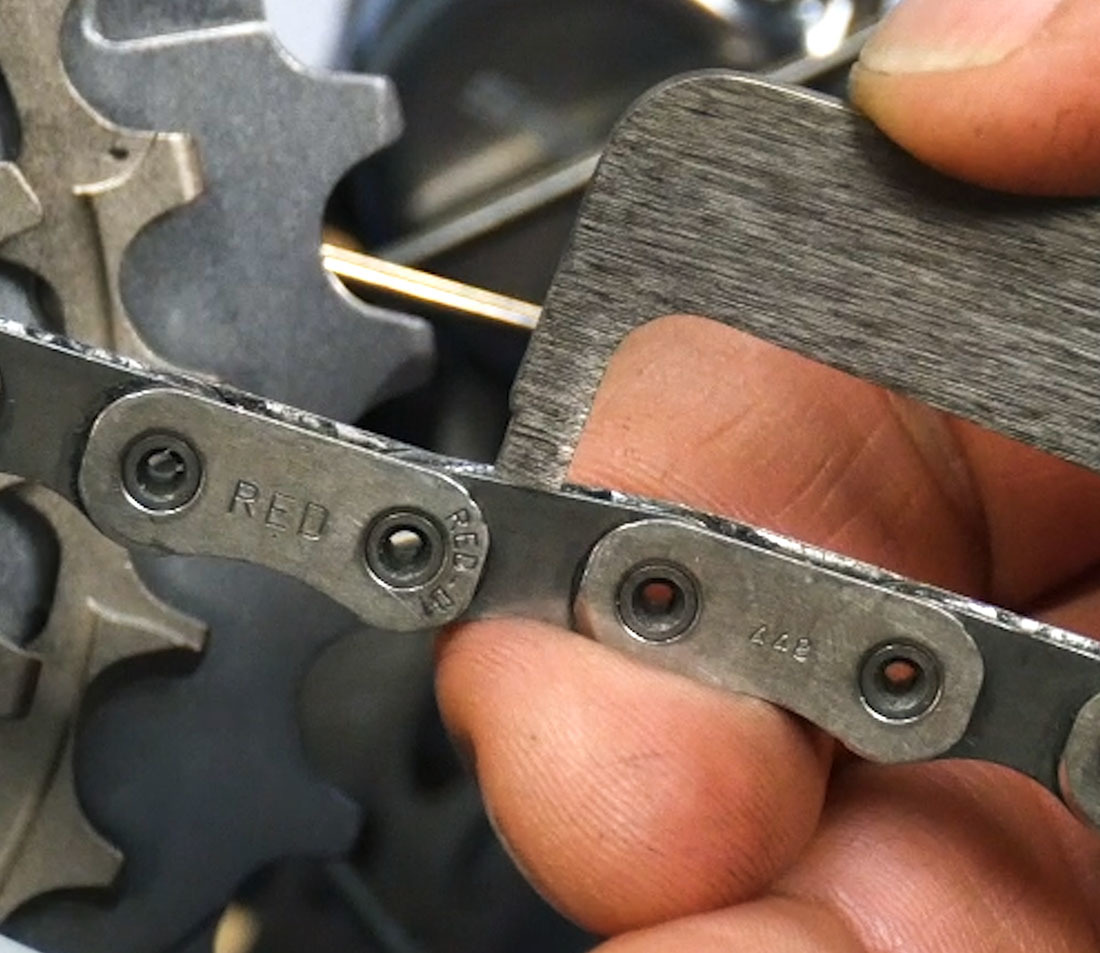
This chain is not yet worn to 0.5% wear
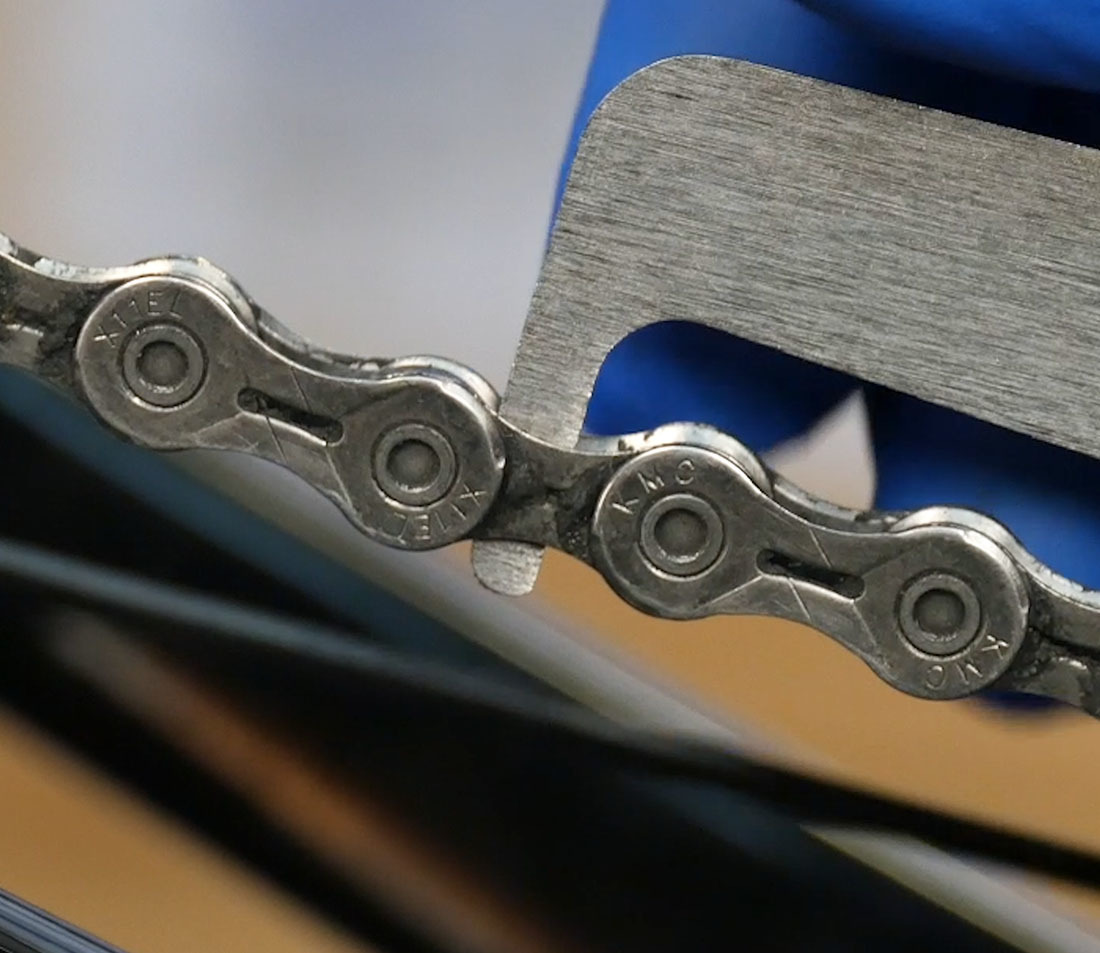
This chain is worn to at least 0.5% wear
Method 4: Use CC-3.2
To start measuring chain wear with the CC-3.2, locate the end of the tool with the 0.5 stamp. Install the hook end on a link with inner plates to ensure you’re measuring against the roller and not the side plates. Attempt to install the other end into the chain.
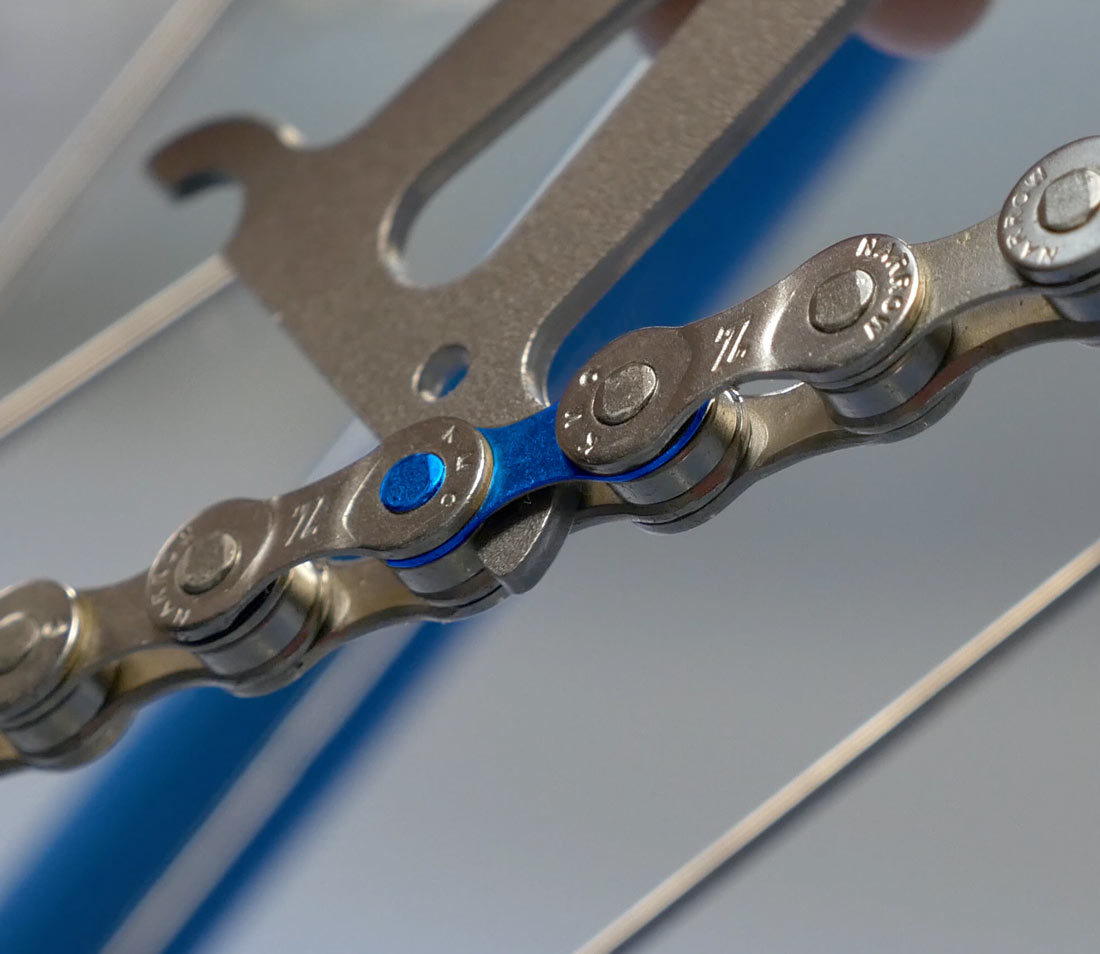
Hook on roller between inner plates
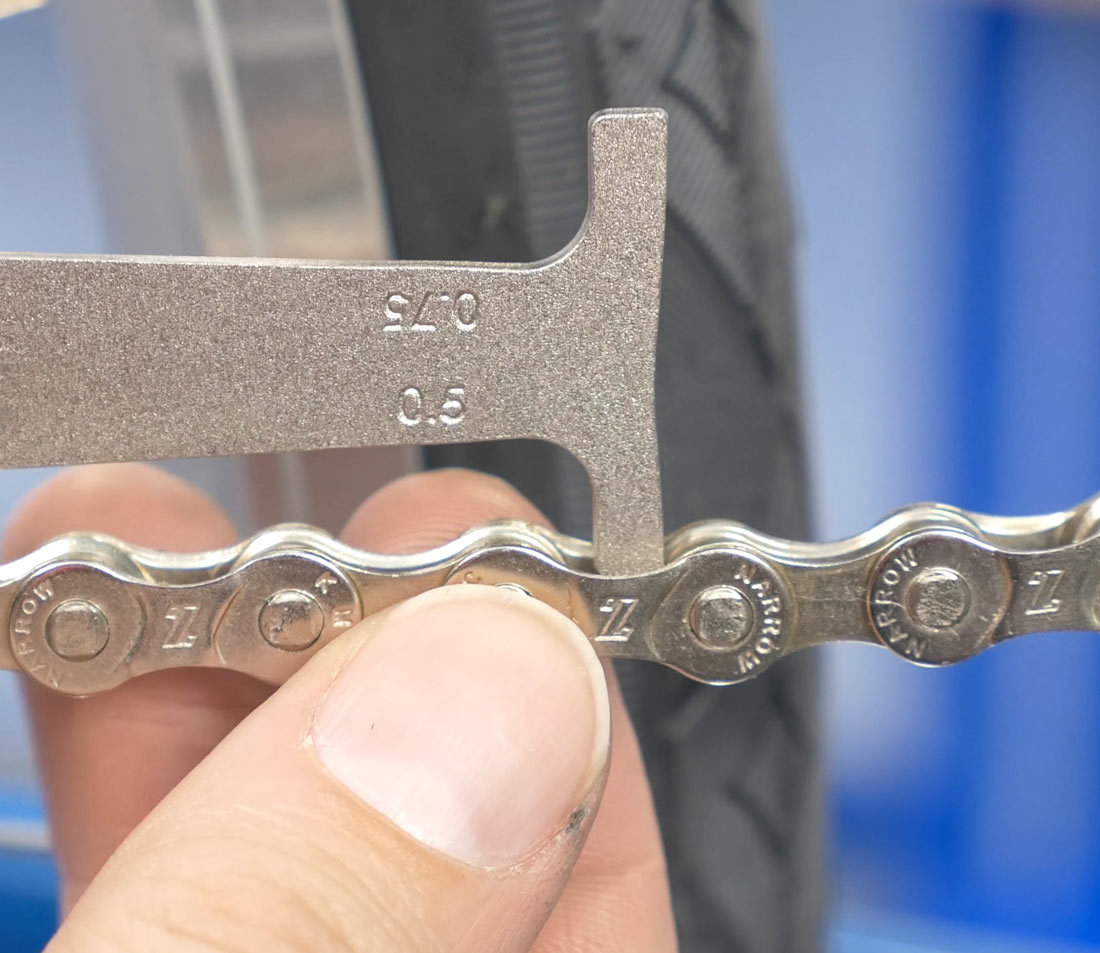
Check wear at other end
If it doesn’t go in, your chain is not yet 0.5 percent worn. If it does insert into the chain, it means that your chain is now 0.5 percent longer than when it was new. Flip the tool over to check if your chain is 0.75 percent worn. If it doesn’t insert into the chain on the 0.75 percent end, your chain is not yet 0.75 percent worn.
Method 5: Use CC-2
To measure chain wear using the CC-2 Chain Checker, insert the rear stud between two outer plates and the front stud between two inner plates.
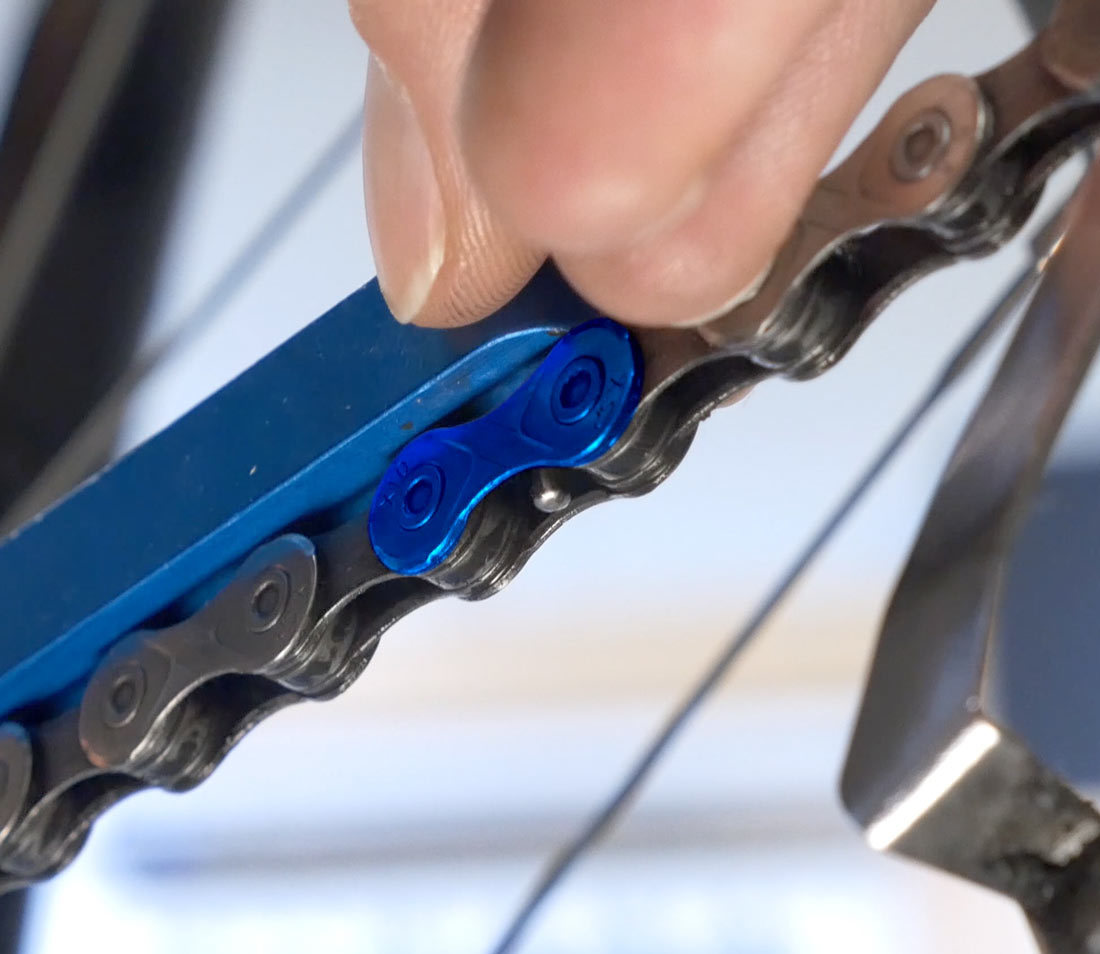
Rear stud between outer plates
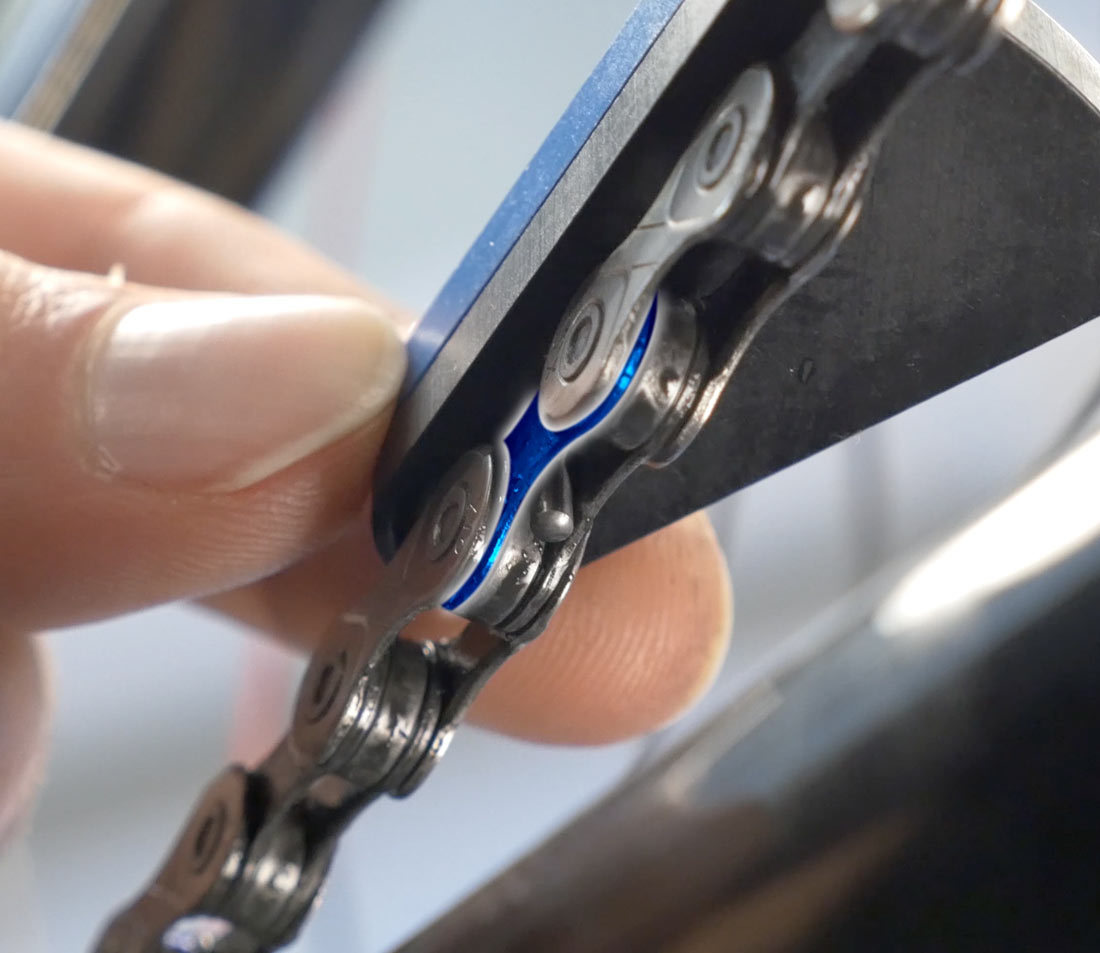
Front stud between inner plates
Push lightly on the lever to take slack out of the chain and feel where it comes to distinct stop. Don’t force the tool beyond the stopping point. The reading in the window will tell you the percent wear of your chain. It’s that simple.
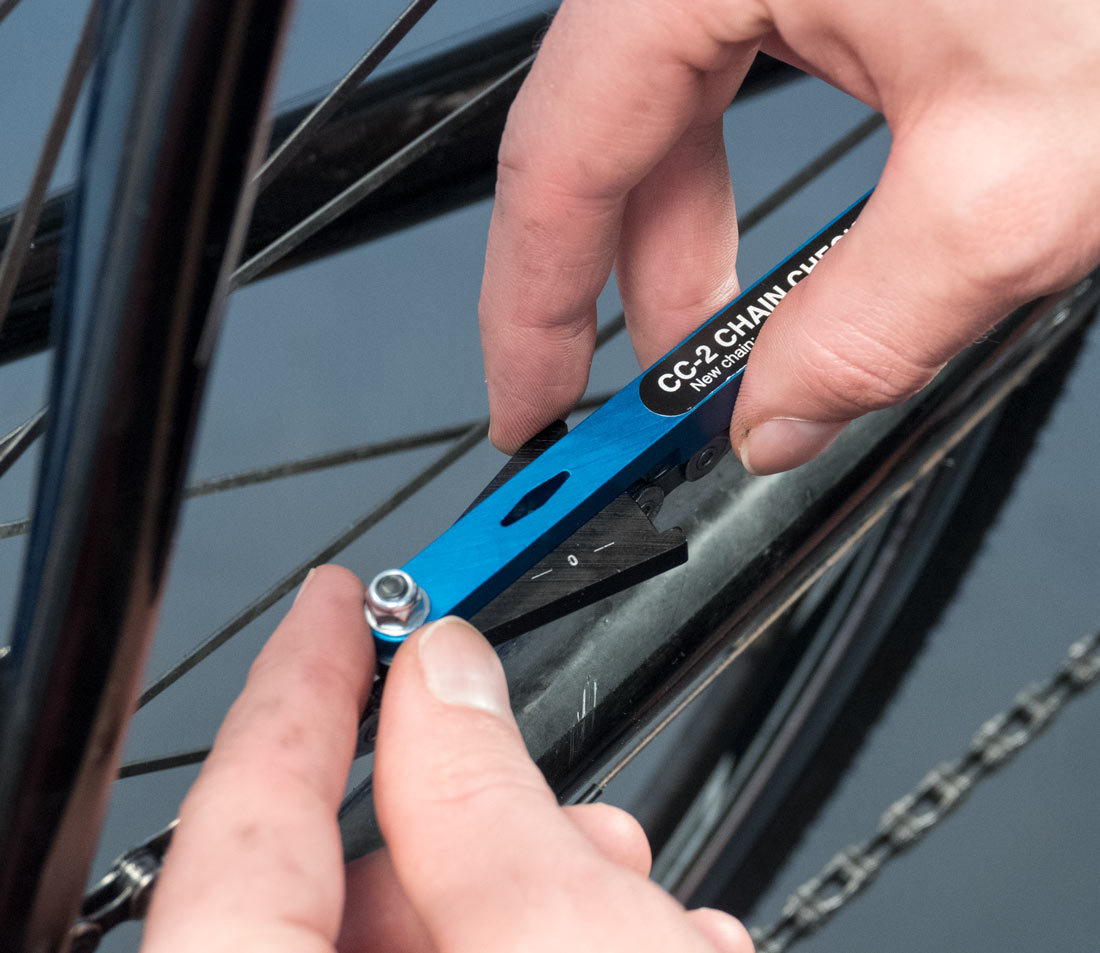
Push to remove slack
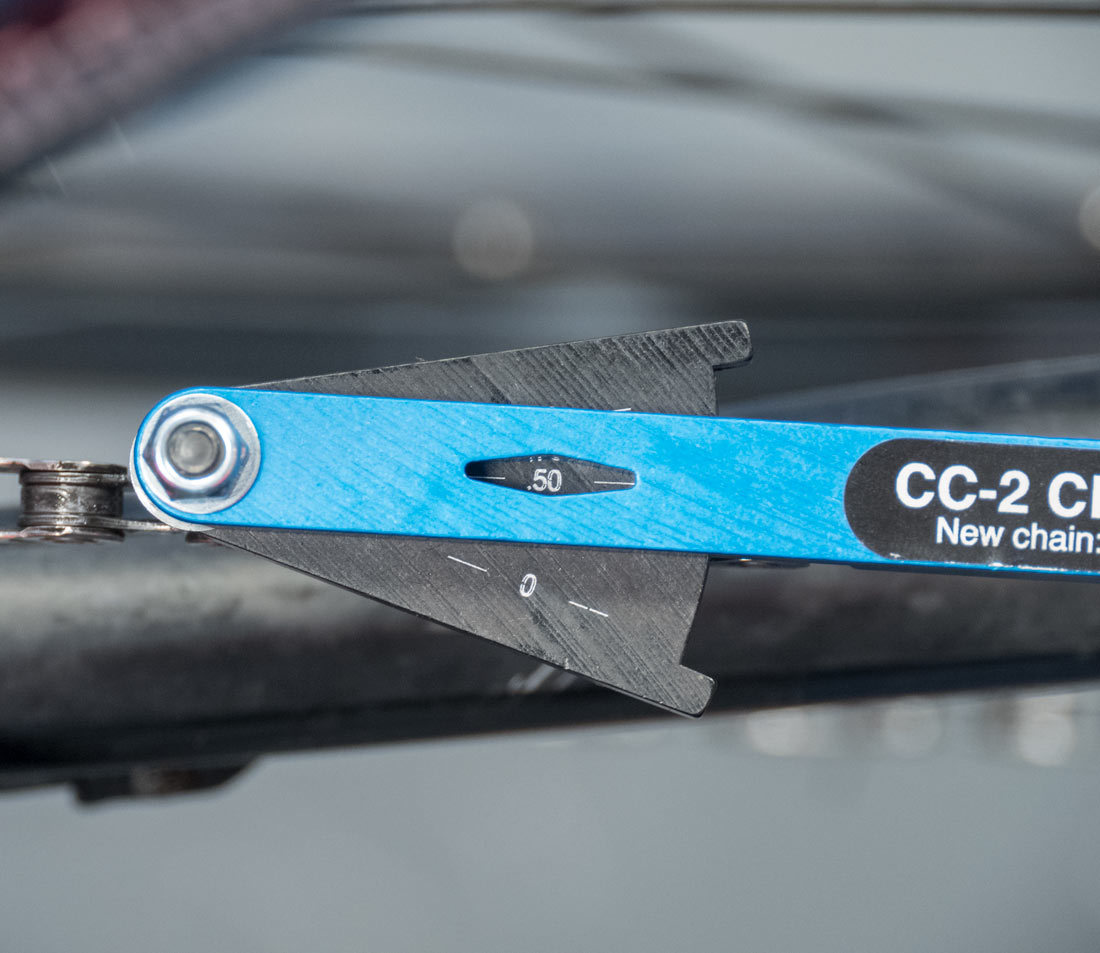
Check reading in window
What The Numbers Mean
Every drivetrain manufacturer has their own specifications, so consult with the manufacturer for the recommended wear level for your system. Below are some general guidelines. Your chain should be replaced by the time it reaches the wear value specified.
| Drivetrain | Wear |
|---|---|
Single-speed |
1.0% |
10-speed cassette/freewheel or less |
0.75% |
| 11-speed cassette or more | 0.5% |
Remember, using a chain beyond its intended wear limit will prematurely wear out your cogs and chainrings, so staying on top of this routine maintenance task can save you a lot of cost and hassle in the long run.