How to Adjust a Threaded Headset
Explains how to adjust a threaded headset, from identifying one to setting the adjusting race and locknut. A correct setting gives smooth, longer lasting steering.
In this article
A properly-adjusted headset allows for smooth turning and maximizes the life of a bicycle's components. This is the procedure for adjusting the old-school style threaded headset.
Threaded vs. Threadless Headsets
Before adjustment, first verify if the headset is threaded or threadless. A threaded headset uses a fork with a threaded steering column. An adjusting race and locknut thread onto the steering column, setting the bearing adjustment and securing the fork in the frame. A quill stem is then installed into the steering column.
A threadless headset system uses a fork with a smooth (unthreaded) steering column. A stem and spacers are installed onto the steering column, and a top cap is installed in the top of the steering column. The top cap sets the bearing adjustment, and the adjustment is locked in place by tightening the stem onto the steering column.
These are grossly simplified explanations. A full breakdown of both systems can be found in the articles for threaded headset service and threadless headset service, but it is fairly easy to visually identify both systems. If wrench flats are visible above the top cup, the bicycle has a threaded headset.
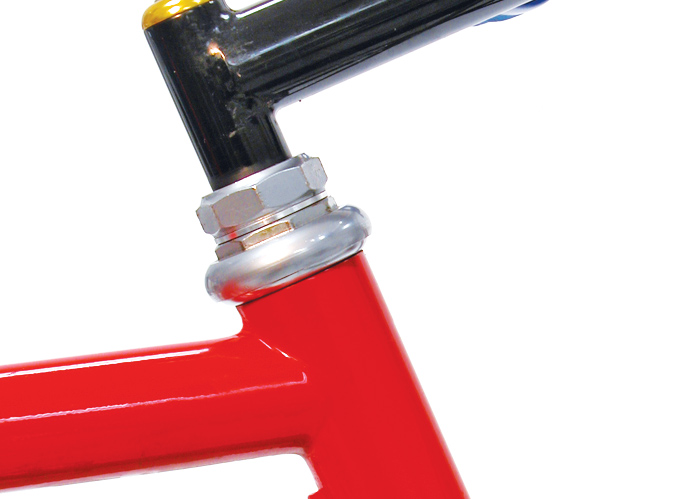
Example of a threaded headset. Note the presence of wrench flats.
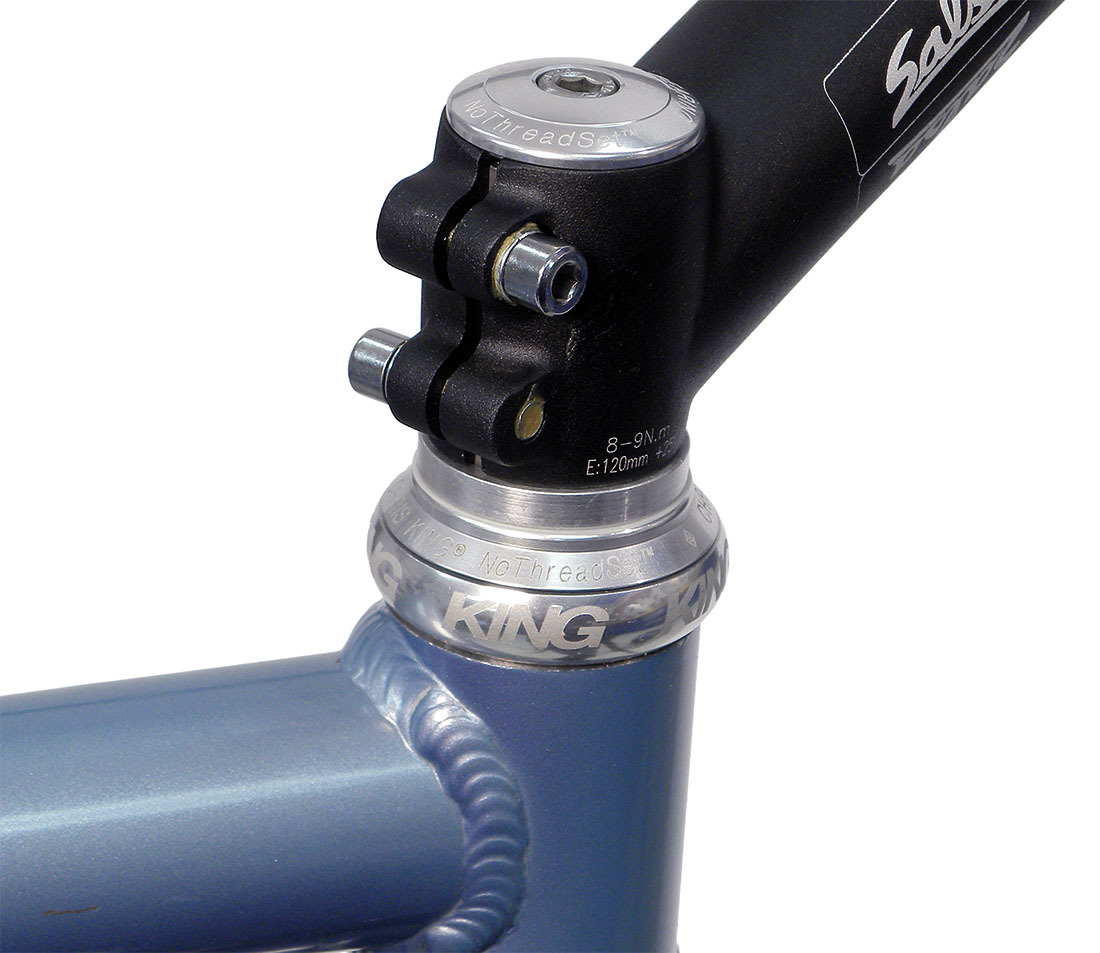
Example of a threadless headset. Note the lack of wrench flats.
Diagnosis
All bearings on a bike have some friction as they rotate. This is normal and does not affect the ride. Better quality bearing surfaces are ground smoother and will have less friction and resistance to turning. Adjustable type bearing systems use two opposing races which can be moved relative to one another.
If a headset adjustment is too loose, there will be play in the bearing system. The bearings can move up and down and are subject to being rattled or slammed against the race surface with each minuscule impact to the front tire. Over time, this can cause wear to the surface of the races and even deform the ball bearings themselves. A loose headset with play may also handle poorly.
To check for a loose headset, apply the front brake and the put your free hand over the headset and head tube. Rock the bike back and forth, and feel for a play between the components. A knocking or rocking movement between the frame and the threaded race is an indication of a loose headset.
The adjustment can also be too tight. Headsets that are run too tight can cause premature wear and can get “indexed” or feel “notchy”. Often a headset that is adjusted too tight will feel stiff and may feel rough.
The appropriate adjustment for a headset is as loose as possible with no play.
Adjustment
The procedure for threaded headset adjustment is very similar across all types of threaded headset standards. Typically the only difference is the size of the wrenches. It can be helpful to install a wheel in the fork before making this adjustment—the wheel acts as a lever to hold the steering column while you make adjustments.
The threaded headset uses a threaded bearing race that is adjusted and held securly by a locknut. This adjusting race commonly has narrow wrench flats. Use a headset wrench such as the Park Tool HCW-15 to hold and adjust this race. The locknut will typically have wrench flats the same size as the adjusting race but will be thicker, and will usually accept a standard adjustable wrench.
- Using a headset wrench, hold the lower race in place. Make note of the wrench position—this will give you an indication of the setting of the race relative to the bearings.
- Using a large adjustable wrench, loosen the top locknut about one half turn.
- Noting the original position of the adjusting race, make a small adjustment by giving the wrench 1/8 of a turn, or a larger adjustment in the form of a 1/4 turn. Turn clockwise to tighten or counterclockwise to loosen.
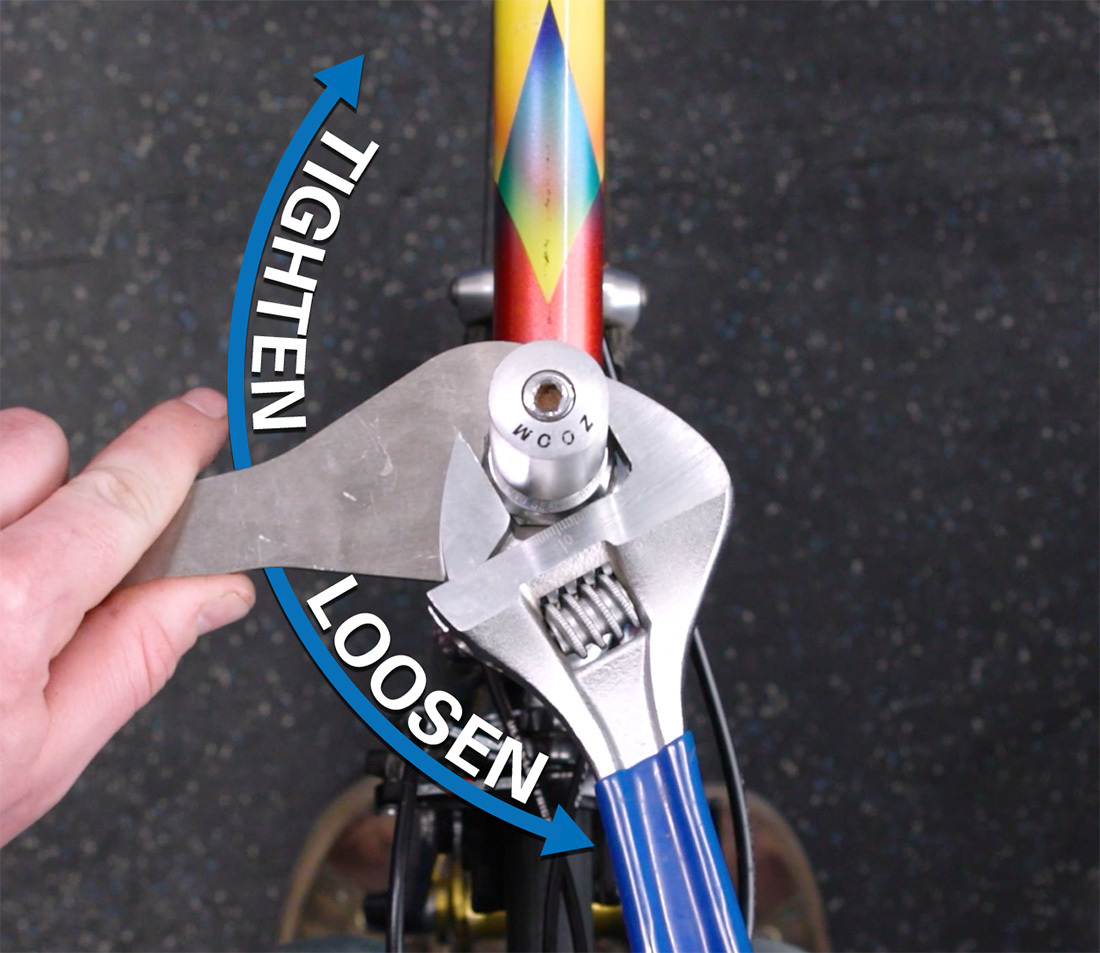
- Hold the lower race and tighten the top locknut. This locknut should be torqued to roughly 20 Nm. Using perceived effort on the wrench held about 6″/15 cm from the center of the nut, apply about 30 pounds/13.6 kg of pressure.
- Check the headset again for play.
- Repeat the adjustment if necessary, tightening about 1/8″ turn on the adjusting race.
Once play has been eliminated, and the handlebars rotate without roughness or stiffness, the bearings are adjusted.
Troubleshooting
If you find yourself unable to find the sweet spot between too tight and too loose, there may be several culprits:
Bearing Quality
Bearing surfaces are made from hardened steel. The surfaces are cut typically by grinding. Round ball bearings roll on the curved surface of the cup and cone. Even the highest quality bearing surfaces will have slight grinding marks. Bearing surface smoothness will vary between manufacturers and between models. Some bearing systems will simply feel smoother... because they are smoother. This is why it is difficult to adjust by using a subjective feeling of smoothness. Generally, adjust bearings for the loosest setting that has no knocking or play, regardless of this relative smoothness.
Worn-Out Headset Components
If after adjusting a headset for being too tight, it still feels rough and excessively sticky, it may simply be worn out. The headset should be replaced. Keep in mind that low-end components will generally feel less smooth even when properly adjusted, just as higher-quality headsets and bearings will feel smoother.
If the headset seems to lock in place or center itself when the wheel is straight, it is likely the lower races have dents from the ball bearings. The result is the headset is locking into the one forward position. The headset should be replaced.
See Threaded Headset Service for more information on replacing components on a threaded headset.
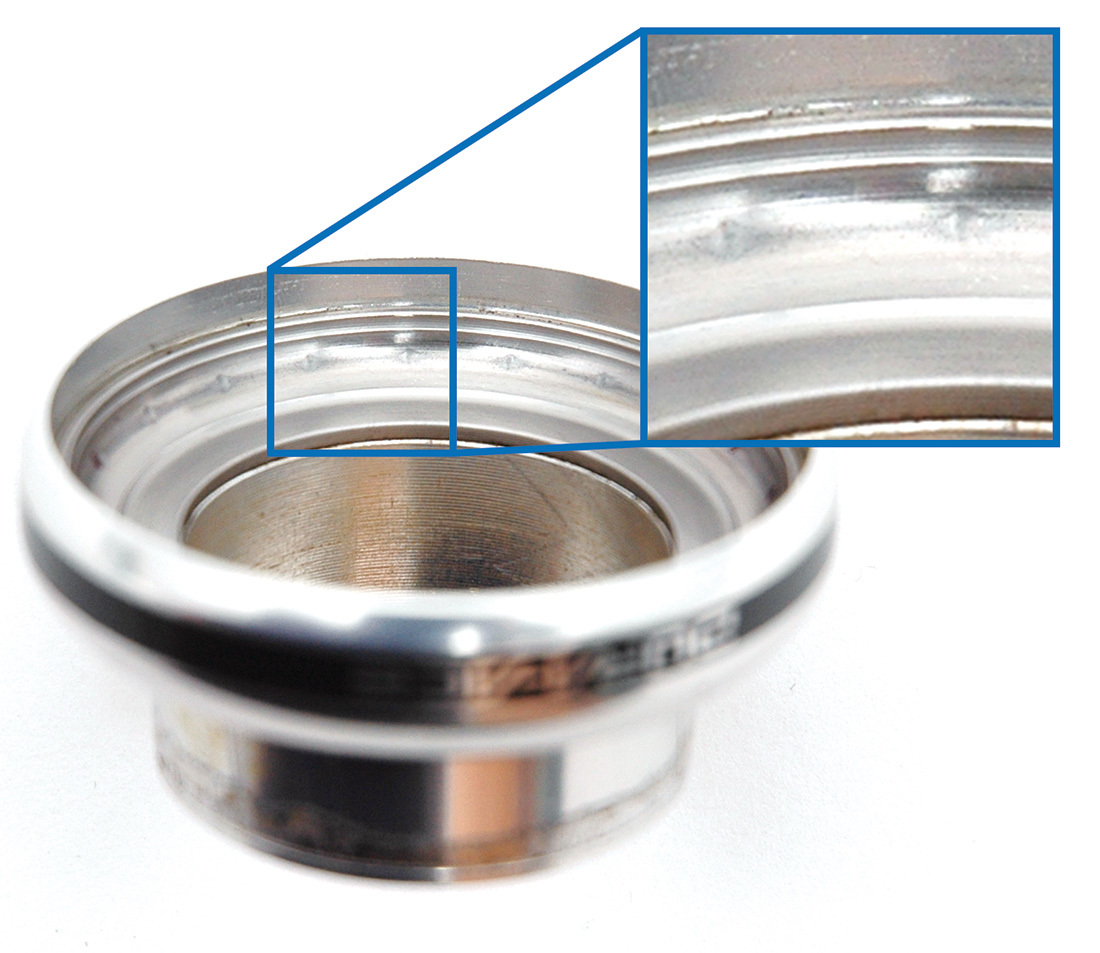
Locknut Bottomed Out
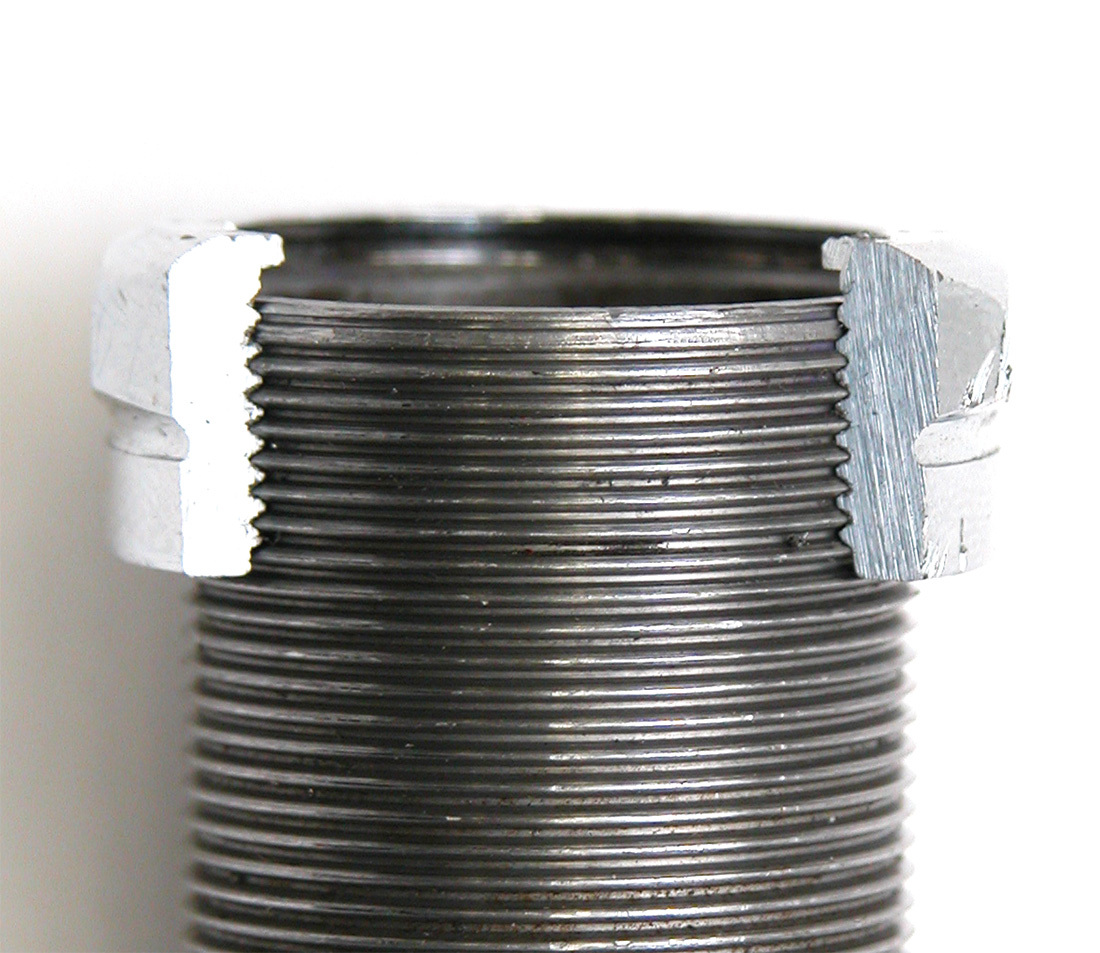
If the adjustment keeps changing without any adjustments, the locknut may not be working correctly. If your steering column is extra long and your headset does not have a spacer, the locknut may be bottoming out on the top of the steering column and not properly locking the adjustment.
To fix this, remove the stem and locknut, install a spacer and reinstall the locknut and stem.
Headset Cannot Move Freely with No Play
This can happen if there is a component out of position or the bearing cage was installed upside down. Disassemble the headset and verify that all components are in correct place. See Threaded Headset Service for a detailed walkthrough of correct component orientation.
Loose Cups or Adapters
Over time, a loose headset may allow play in the cup or adapter of the headset, wallowing out the head tube. A bearing adjustment will not fix this. If a cup or adapter is so loose that can be easily turned by hand while installed in the frame, you may be able to secure it in place with some retaining compound. Otherwise, it may be time to look into a new bike. Consult a professional to determine if there is an alternative solution.