How to Remove and Install a Seatpost
Walks through removing and installing a bicycle seatpost, plus judging size compatibility and troubleshooting problems. Helps you avoid a post that slips or sticks.
In this article
This article will walk through the removal and installation of bicycle seatposts, as well as information on determining compatibility and troubleshooting potential issues.
Preliminary Info
This article pertains to rigid seatposts. For information on installing a dropper posts, check back later for a complete article and video on the process.
Round Posts
The common post is round and fits into a round seat tube. The post should only be slightly smaller than the inside of the seat tube — typically, only about 0.1 mm smaller. This allows the post to slip inside the seat tube.
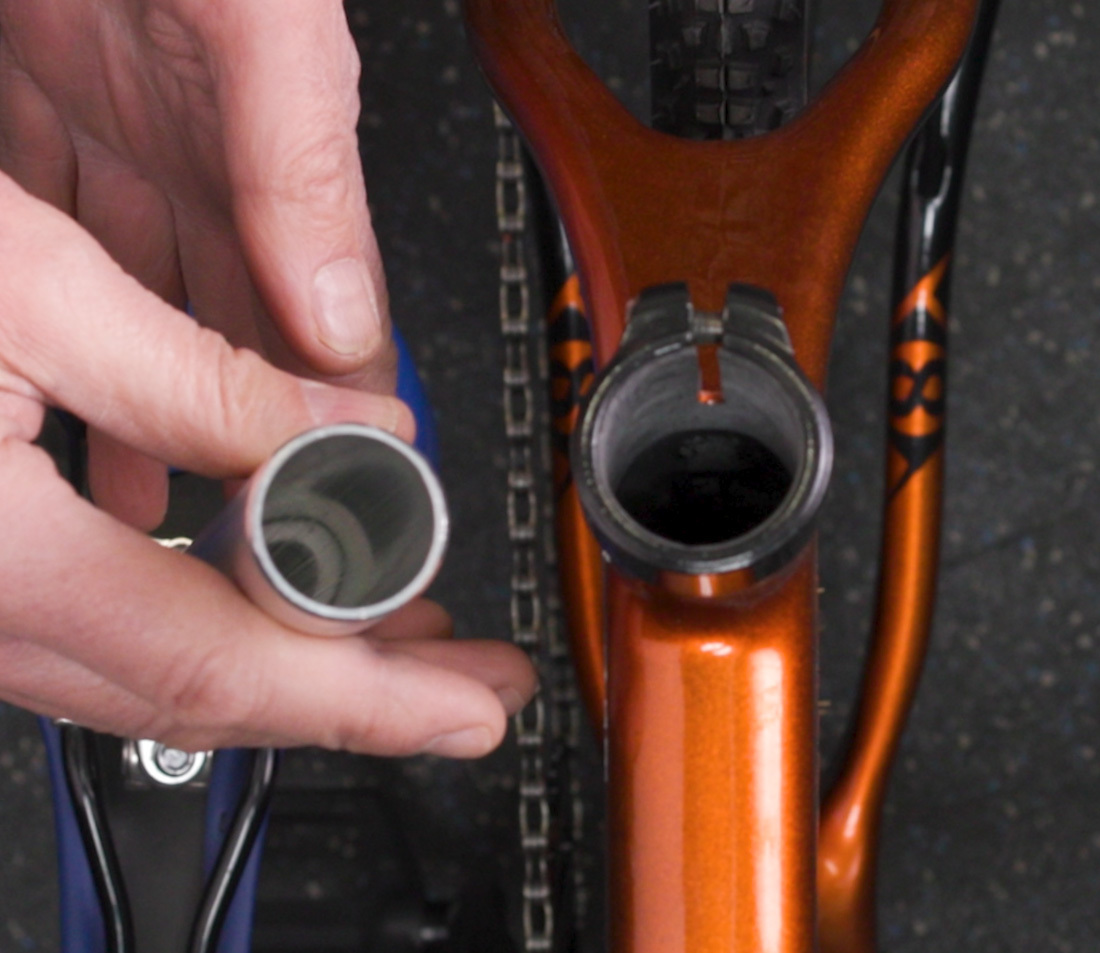
If the post is too large, it will not fit or could get stuck if forced into the seat tube. If the post is too small, it cannot be properly secured in the bike. There are numerous seatpost standards in existence, some within 1 mm of each other, so it is important to verify that the frame and post are compatible with each other.
The diameter is commonly marked on the post. You can also use a caliper to measure the post outside diameter.
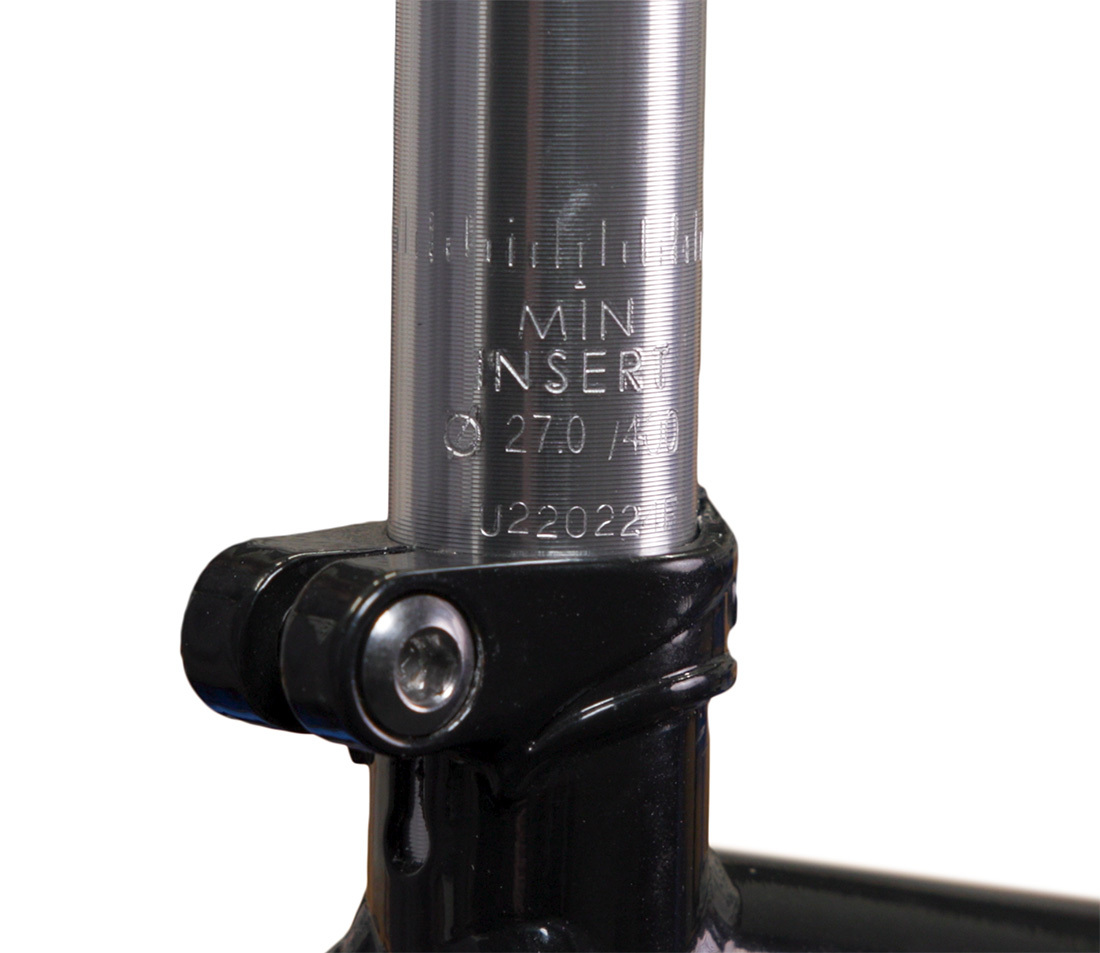
This seatpost is 27.0 mm, as seen on the markings
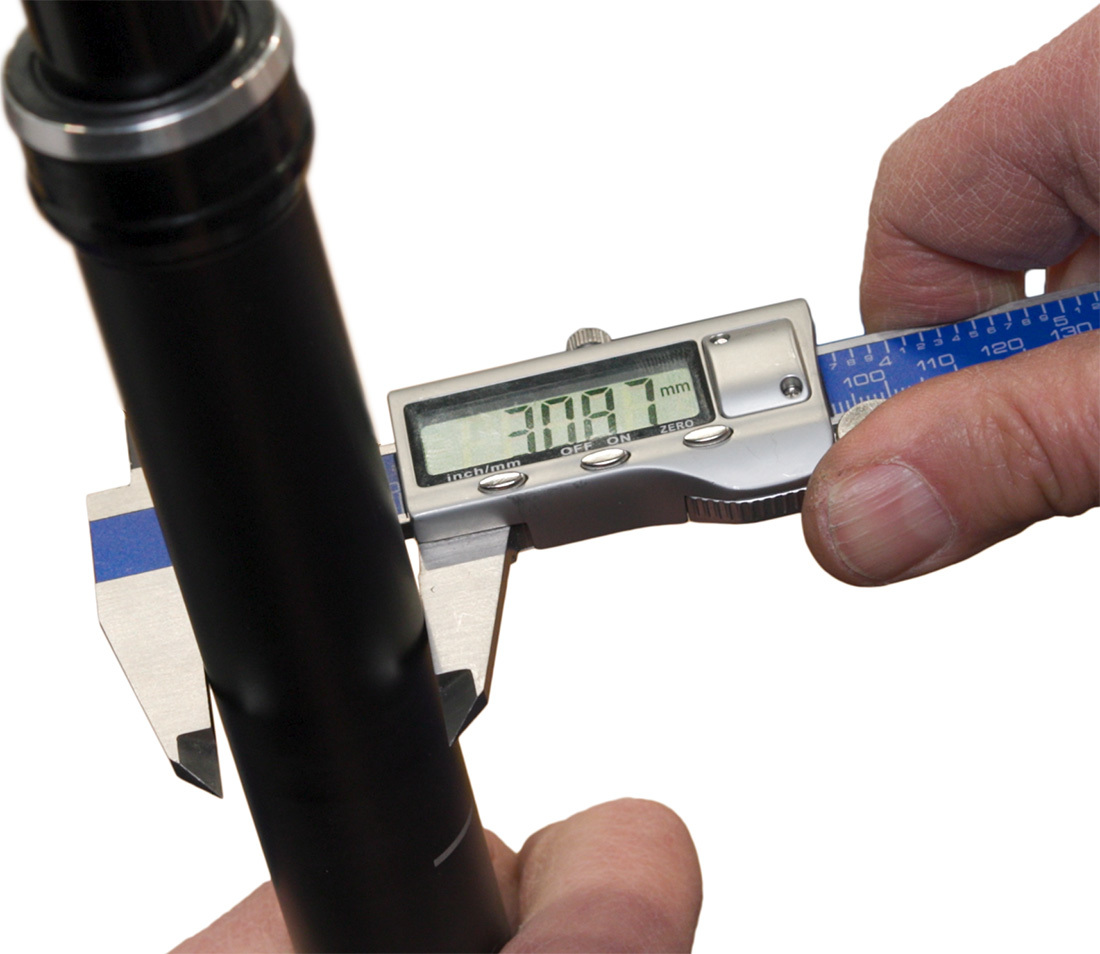
The diameter of this post is reading 30.87, but is rounded to 30.9.
Bicycle manufacturer websites may also list the seatpost and/or seat tube diameter required if you don’t have the previous post, or are not sure of your seatpost size.
To manually measure the ID of the seat tube, take 2-3 measurements at different positions, and then average the readings. A caliper is recommended to get a precise reading.
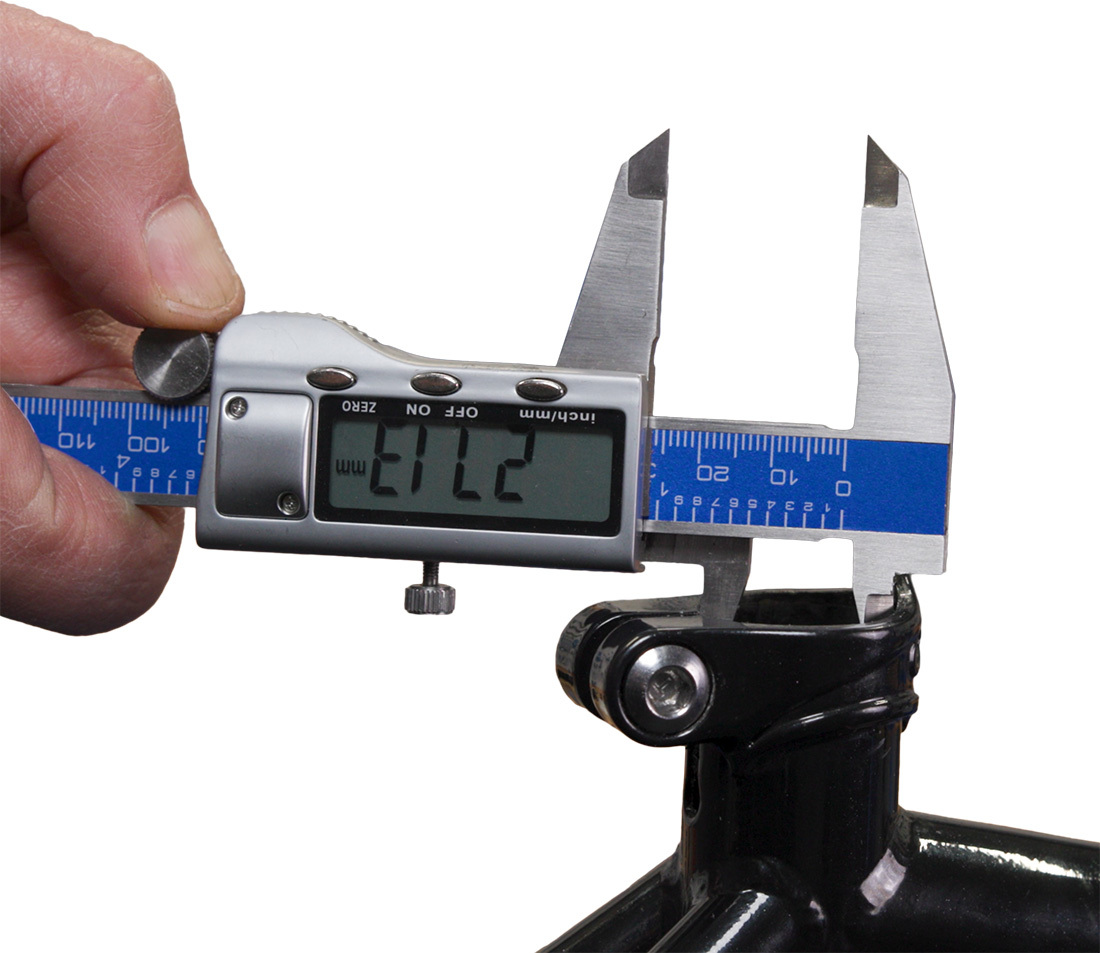
There are some seatpost designs that fall outside the norm. These posts are typically proprietary to the bike manufacturer, and replacements must be compatible with the specific frame designs. Contact the manufacturer for more information.
Aero Post
A typical non-round example is a bladed or aerodynamic post. The frame matches the shape and secures the post using a compression slot or set screw.
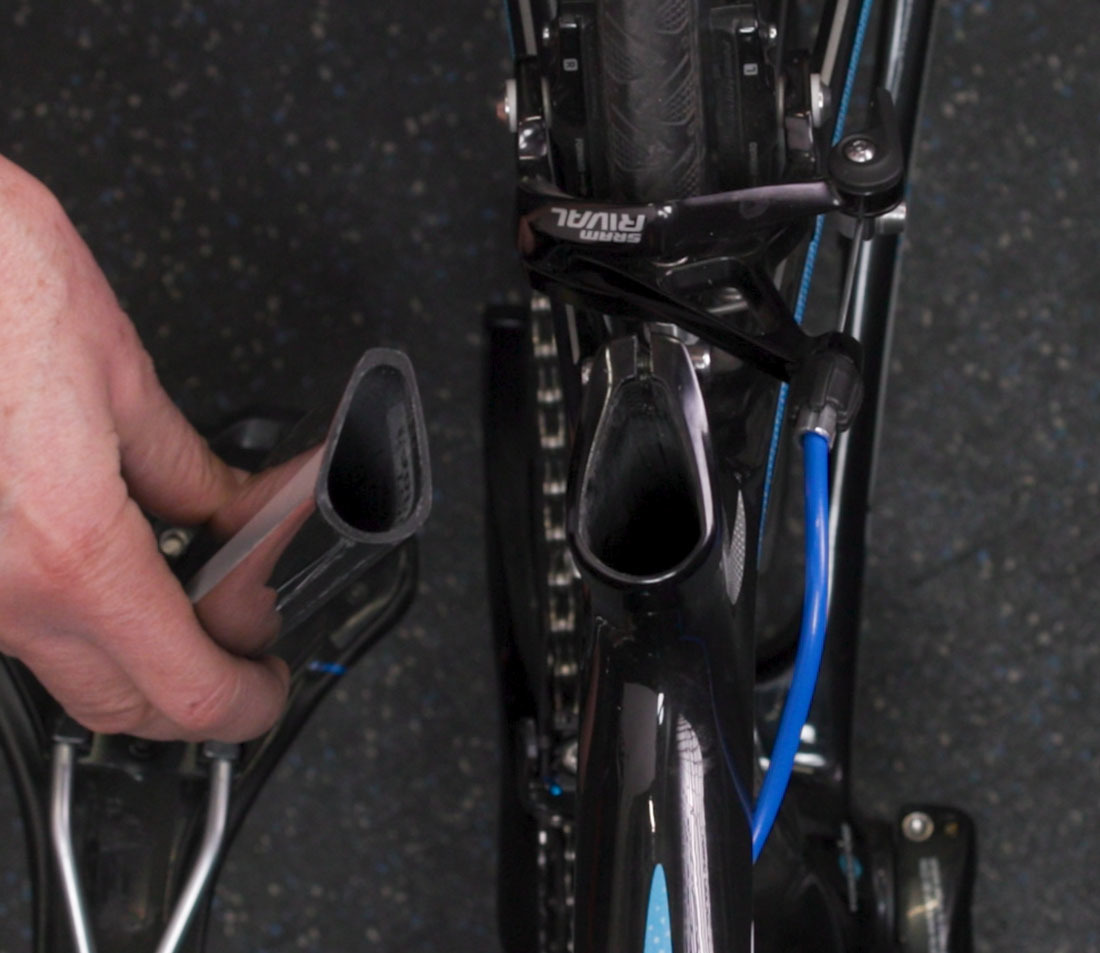
Aero seatpost and compatible frame
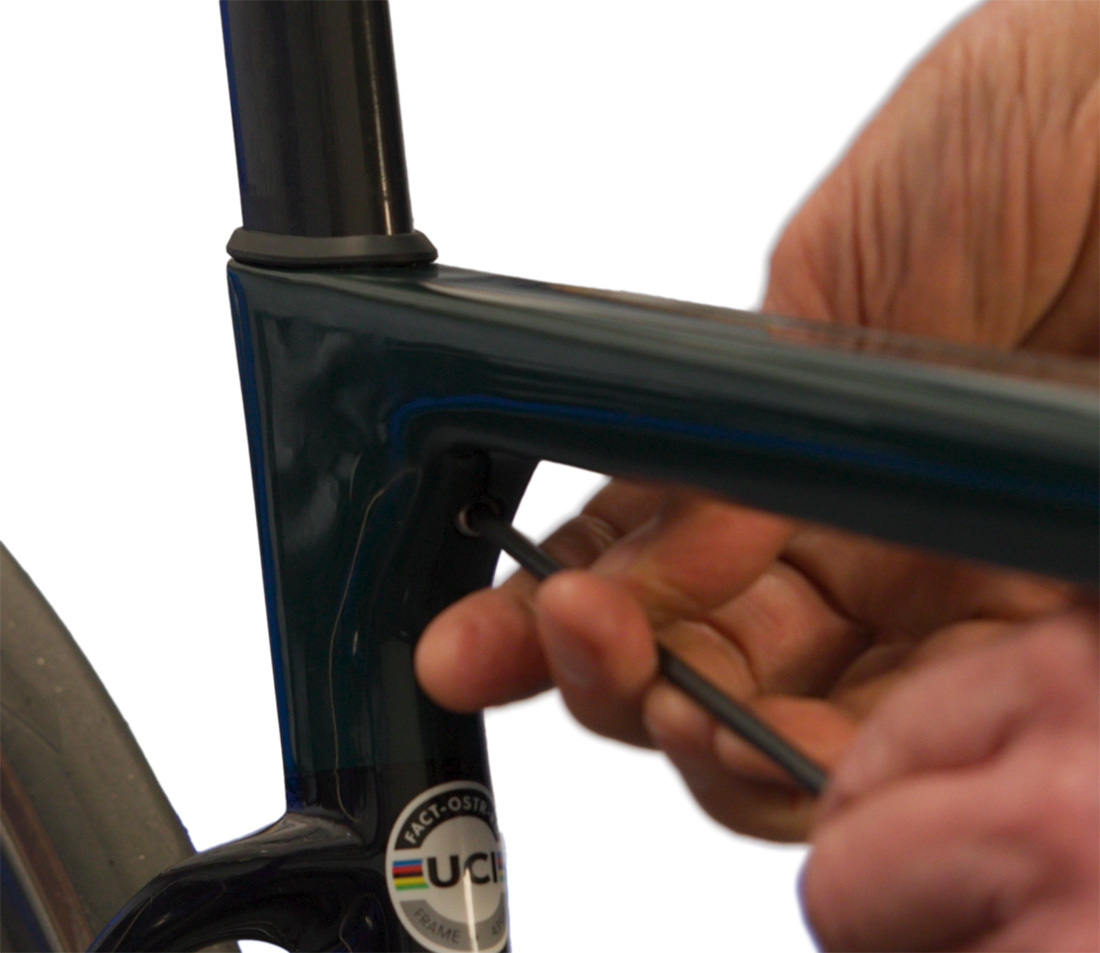
This model uses a wedge system secured by a set screw
D-Fuse
One specific non-round example is Giant’s D-Fuse post standard. This style is secured with a wedge system and bolt that install into the top of the frame.
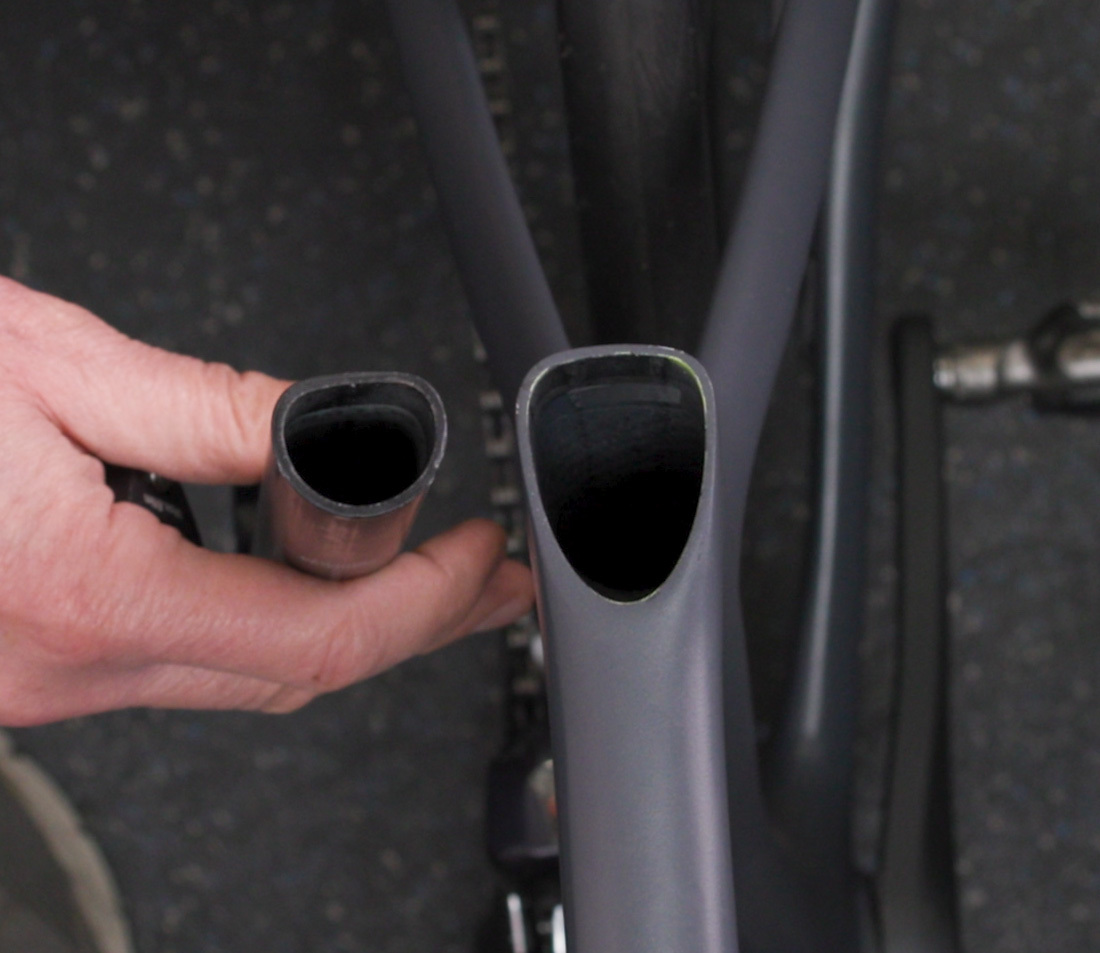
D-Fuse seatpost and compatible frame
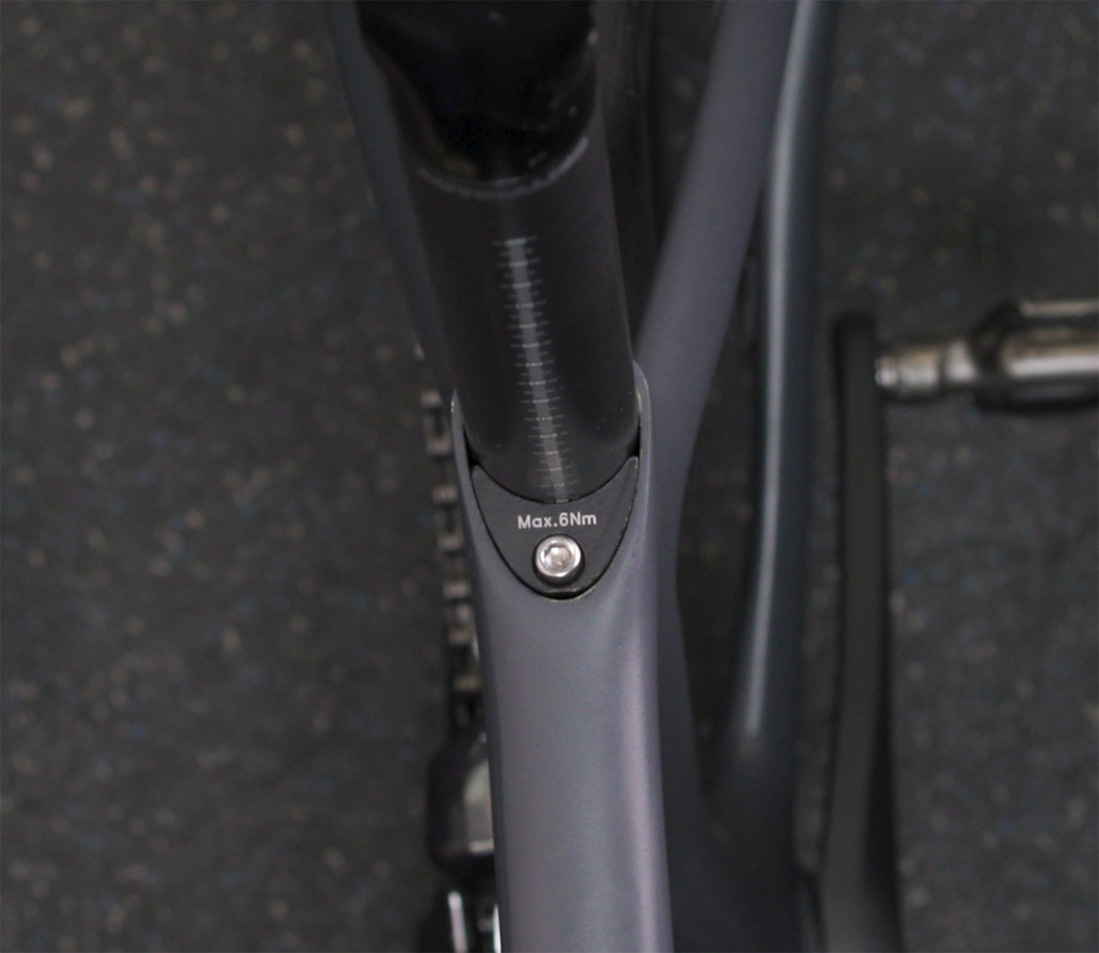
D-Fuse-compatible frame with seatpost and wedge installed
Seat Masts
Some frames do not have a post that inserts into a tube. A seat mast is integrated into the frame, and a shorter seat post fits over the mast and is secured with a compression collar. There are round and aero versions of this system in existence. To set saddle height, the mast is cut. These systems are perhaps the most proprietary of all — check with the manufacturer for any questions.
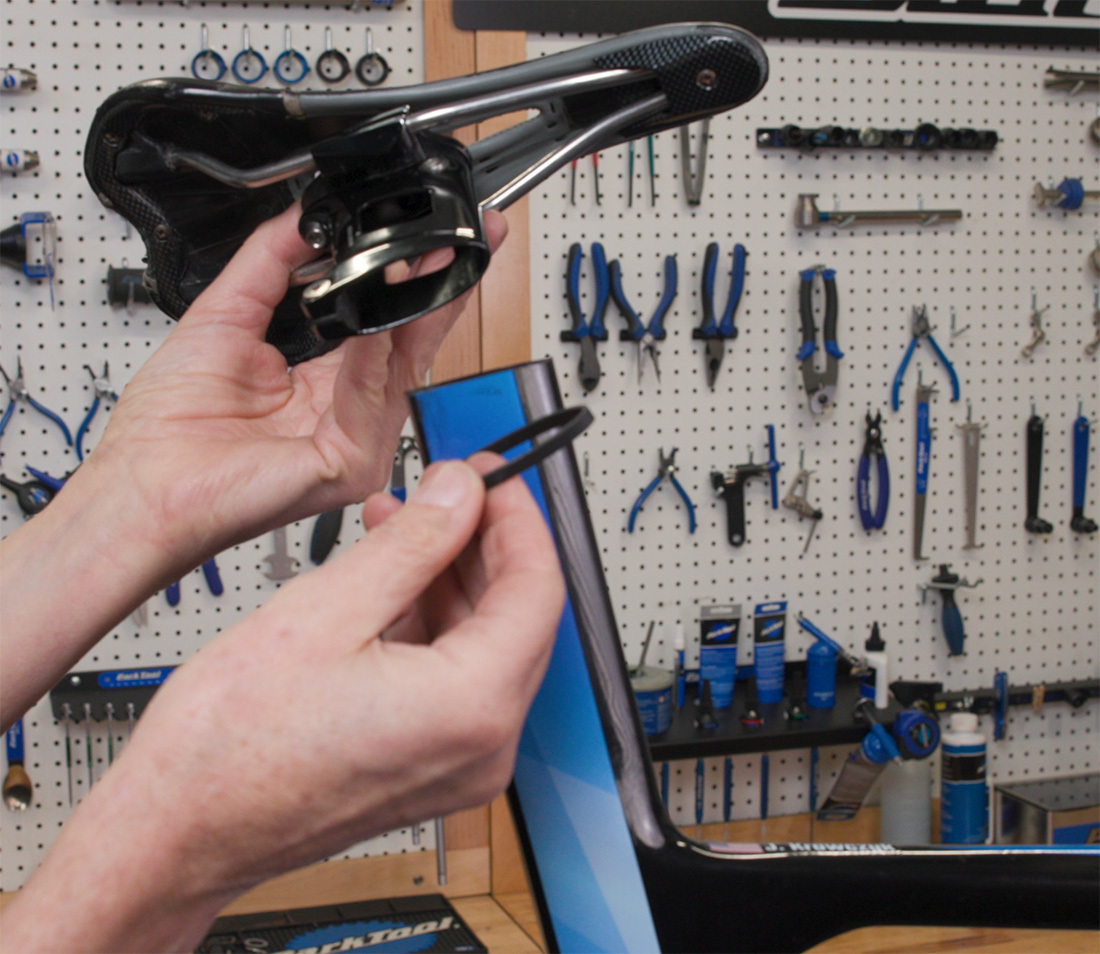
Example of an aero seat mast
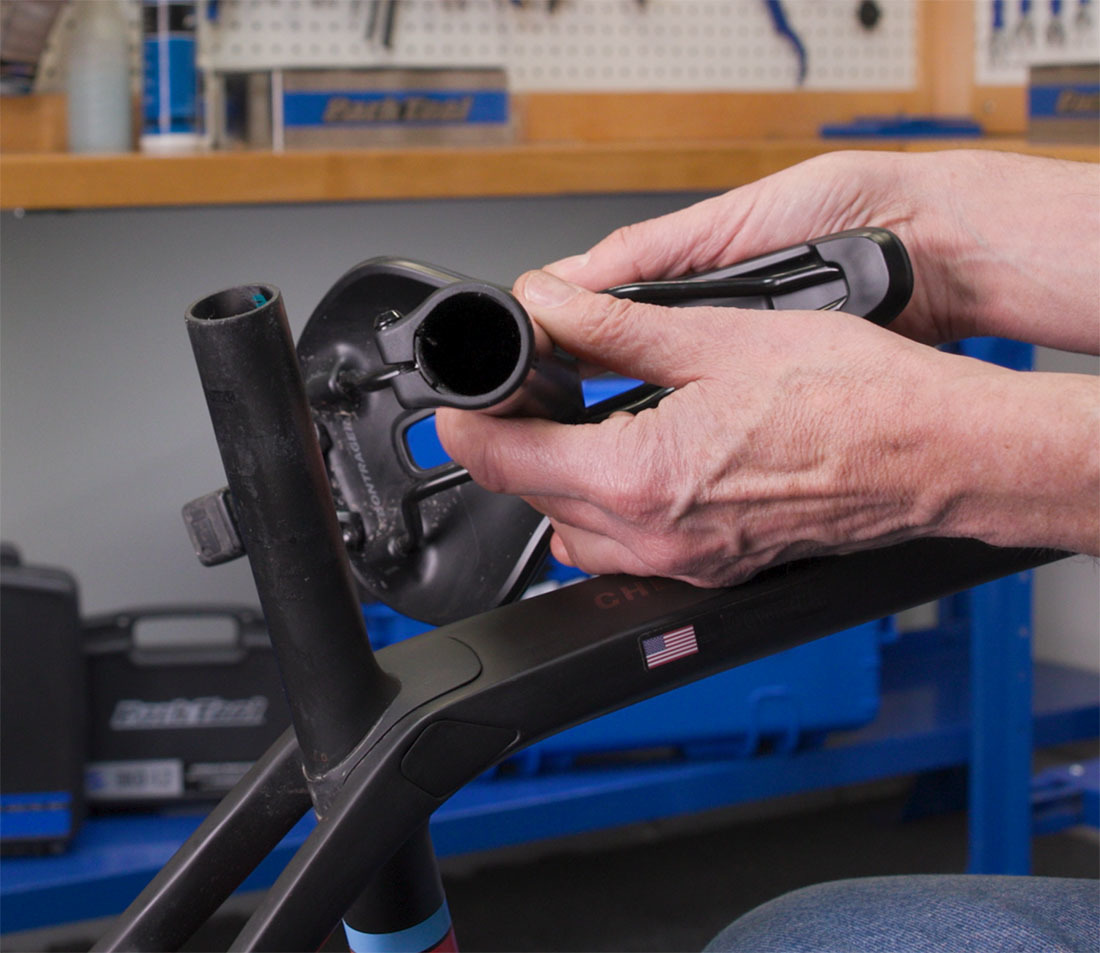
Example of a round seat mast
Seatpost Removal
Removal of the seatpost is relatively straightforward. Look for a clamp bolt or quick release at the top of the seat tube, loosen the bolt a couple of turns (or open and loosen the quick release), grab the post and pull. It may be necessary to also twist as you pull.
If that didn’t work, you may need to get creative. See Seized Seatposts and Stems for more information.
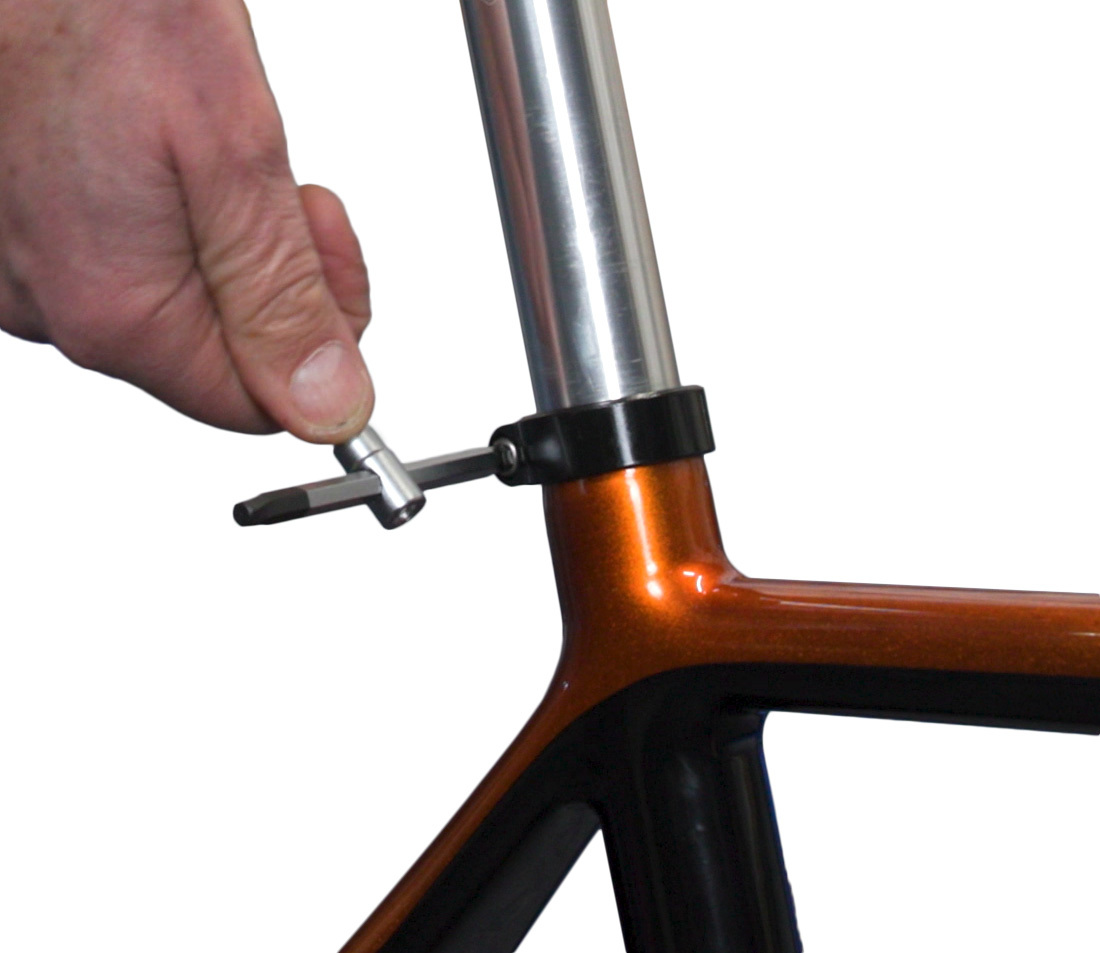
Seatpost collar with clamp bolt
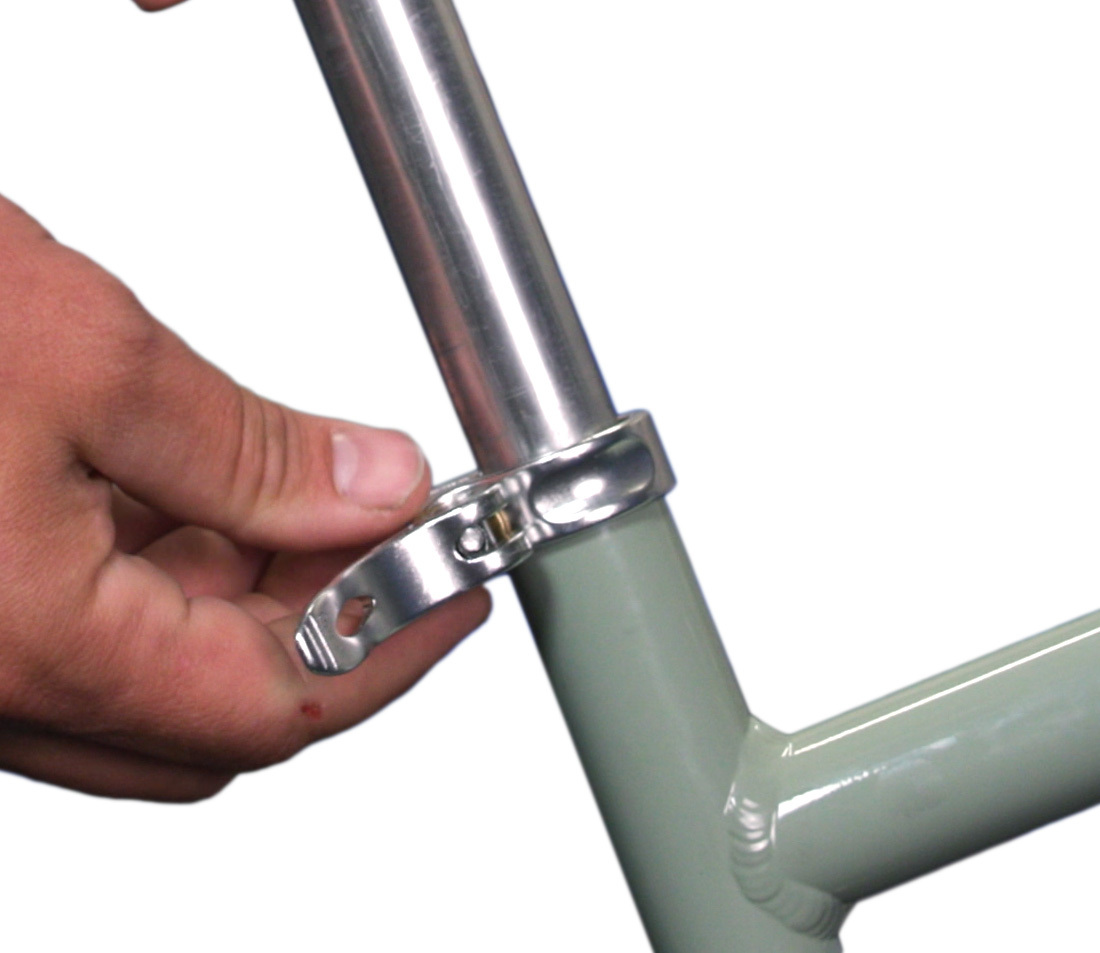
Seatpost collar with quick release
Seatpost Installation
Surface Preparation
Before installing the new seatpost, it’s a good idea to prepare the surfaces. Corrosion and rust developing between the seat post and inside of the seat tube is a concern. If the frame is steel or aluminum with a steel or aluminum post, grease or anti-seize compound are good options. Applying the compound inside the seat tube is the cleanest method — any excess grease is simply pushed inside.
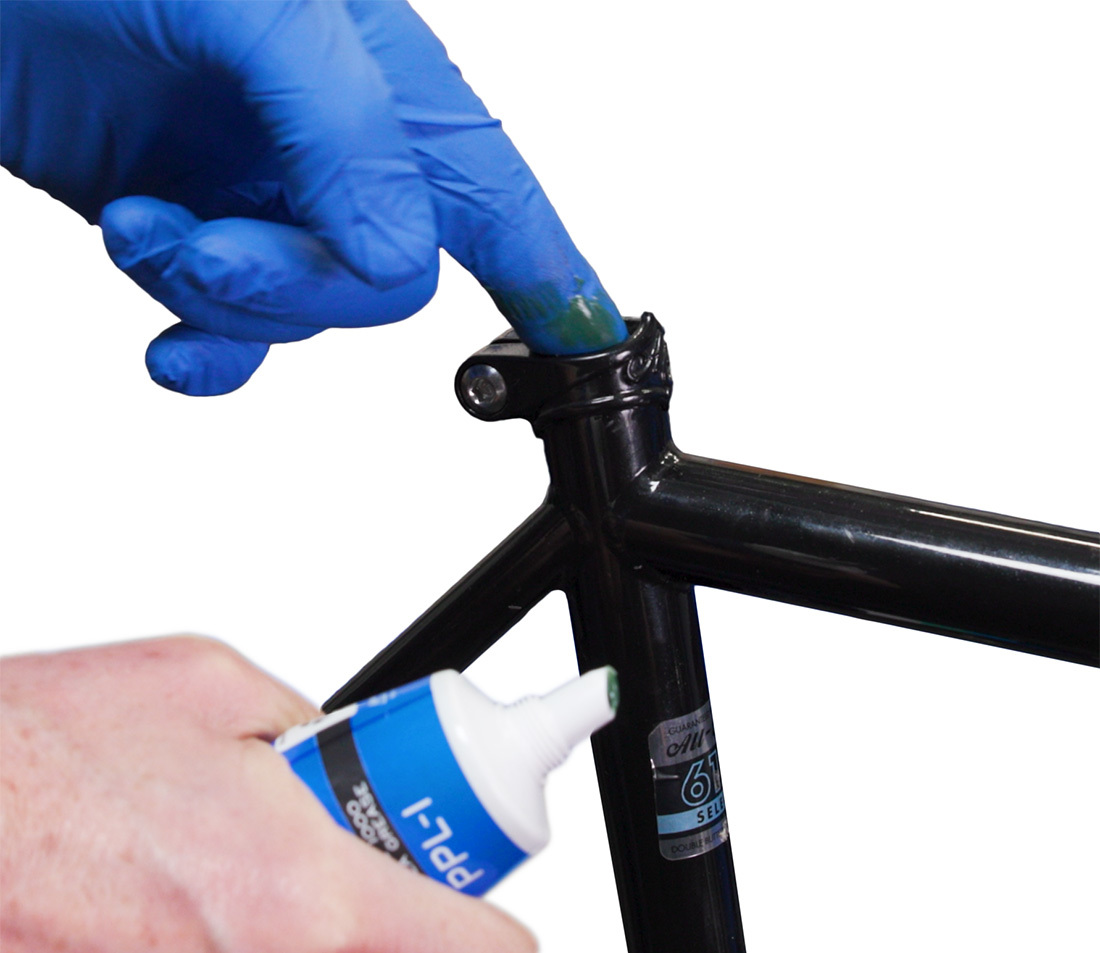
If either the post or frame are made of carbon fiber things get more complex. Always check with the frame or component manufacturer for their recommendations first, but generally speaking, a carbon fiber frame with a carbon fiber post can be left dry.
An aluminum post in a dry carbon fiber frame can result in corrosion. A coating of grease will help keep the aluminum surface away from the carbon fiber surface. The reverse is also true. A carbon post into a steel or aluminum frame needs something to separate the surfaces, and grease is an effective way to do that.
It is also a good idea to occasionally remove the post to clean and re-apply grease.
If the post is slipping at recommended torque values, then an assembly compound may be applied. Park Tool SAC-2, for example, has a silica grit suspended in a greasy carrier. The grit bites into the frame and post to hold it secure.
Setting the Height
It is important the seat post should not be set too high. The post or even frame may fail catastrophically if raised too high.
Inspect the seat post for a maximum height or minimum insertion mark. If there is not such mark, as a general rule for a round post, have at least 2.5 times the diameter of the post inside the frame. For example, for a 27.2 mm seatpost, have at least 68 mm inserted in the bike. When the frame design has a seat tube that extends upward past any joint, try to have the post inserted below the tubing joint.
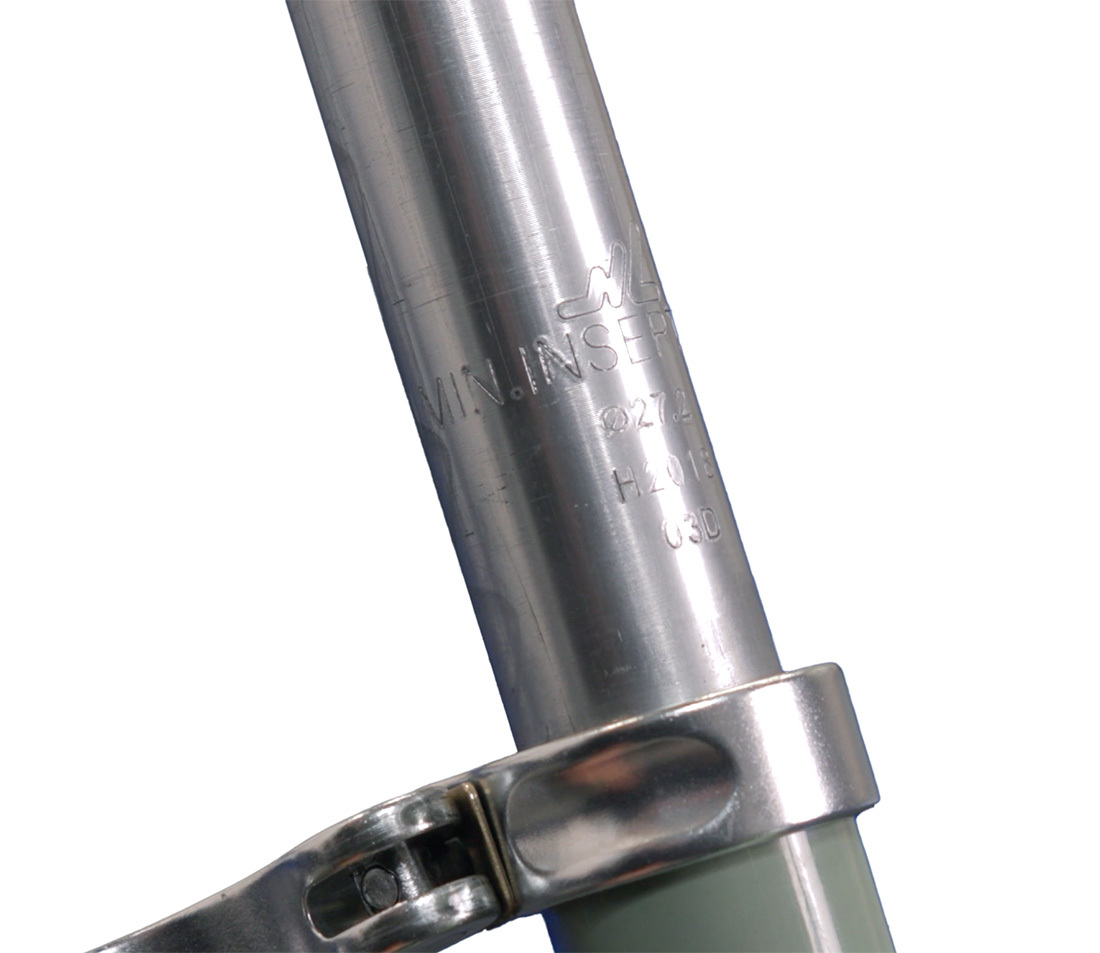
When selecting a seatpost, make sure the post isn’t too long for the frame — the post must be able to insert far enough into the frame to achieve your desired ride height without bottoming out or hitting an interruption. Interruptions could be bends in the frame, water cage bolts, or suspension linkages.
Securing the Post
The common clamping system used on a round seat post is typically secured by squeezing a compression slot or slots in the top of the seat tube. The collar may have a torque recommendation printed on the side. Because the seatpost collar manufacturer does not typically also make the frame or the seat post, these values should be thought of as recommendations.
The seat post binder is tightened so the saddle does not twist side to side. If it does not twist, it will not move downward during use.
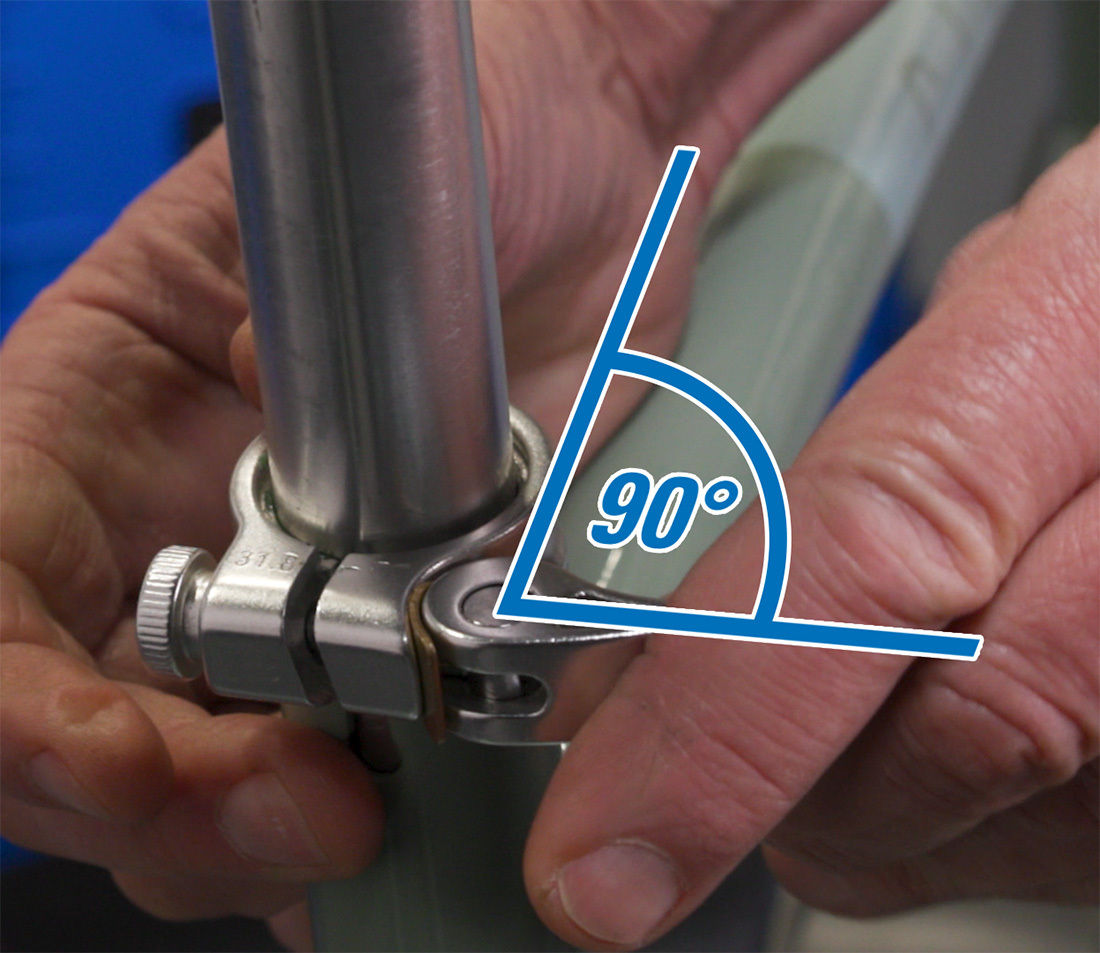
If the seat post clamp uses a quick release, adjust the tension to feel resistance in the second half of the swing closed. Try not to over-tighten the clamp, but if needed, adjust for more clamping force with the adjustment nut. If the post still but does not seem to secure, lubricate the lever arm pivot. This permits the force from the lever to properly pull the clamp closed.
For the final step, you will likely need to install a saddle on top of your new seatpost — see How to Remove and Install a Bike Saddle.
Troubleshooting
Like anything else, even adjusting a seatpost can go awry. Here are a few scenarios you might encounter, and some possible solutions.
Seatpost Will Not Secure Properly
After securing the post, it continues to slip down. There can be several reasons for this.
- The binder bolt may not simply be not tight enough — double check the bolt torque.
- If the bolt thread and bolt head are dry, it may not be allowing the load to be transmitted to the binder clamp. Remove the bolt and grease the threads and head of the bolt. A dry fastener can also occur on a quick release style. Apply a light lubricant.
- If it still does not secure, double check the post is the right size for the frame. If the post-to-frame sizing is correct, it may help to use an assembly compound such as Park Tool SAC-2.
Creaking
Creaking is the result of two things moving against one another.
- The creaking can be the result of the saddle rail binders being loose on top of the seatpost — double check the saddle rail bolt security.
- Movement can also occur between the post and the frame. In this case, remove the post and apply grease or anti-seize. Re-install the the post and secure the seatpost clamp.
- Finally, the saddle body may be loose on the saddle rails. There is no repair for this problem other than a new saddle.